 |
| It was pretty tough decorating a small cake..but I had so much fun doing it |
Have fun making...
Source: Small Batch Baking

Ingredients
Unsalted butter for can
3 tbsp buttermilk
1 1/2 tbsp well beaten egg
1/2 tsp red food coloring
1/2 tsp vanilla extract
1/4 cup plus 2 1/2 tbsp all purpose flour
1/3 cup plus 1 tbsp sugar
1 1/2 tbsp unsweetened cocoa
1/8 tsp baking powder
1/8 tsp baking soda
1/8 tsp salt
2 tbsp unsalted butter, softened
Preheat oven to 350 degrees. Lightly butter the inside two 14.5 ounce cans lightly and dust them with flour. Line the bottom with parchment paper. Place the cans on a baking sheet for easier handling and set aside.
Place the buttermilk, egg, food coloring and vanilla in a bowl, whisk to blend.
Combine the flour, cocoa, baking soda, baking powder and salt in a small deep mixing bowl. Using a handheld beater, beat on low speed to combine. Add the butter and half of the buttermilk mixture; beat on low speed until the dry ingredients are moistened. Increase the speed to medium and beat until batter has lightened and increased in volume, about 45 seconds. Scrape the sides of the bowl. Pour in the remaining buttermilk mixture and beat on medium speed until well blended about 20 seconds.
Scrape the batter into the prepared cans. Bake for about 30 minutes or until a toothpick comes out clean when inserted. Let cool 10 minutes on a wire rack.
Invert the cans and remove the cakes. Cut into half crosswise using a sharp knife; frost between the layers and on top and sides of the cakes with the White Chocolate Cream Cheese Frosting.
White Chocolate Cream Cheese Frosting
2 tbsp whipping cream
1 ounce white chocolate, chopped
3 ounce cream cheese, room temp
2 tbsp unsalted butter, room temp
1 1/2 cup confectioner sugar
1/2 tsp vanilla extract
Method
Place the cream in a small microwave safe cup; microwave at high until hot about 15 seconds. Add the white chocolate. Let stand for 1 minute and stir till smooth. Cool.
Beat the cream cheese and butter in a small bowl on high speed using handheld mixer until smooth. Add the confectioner sugar, vanilla and the melted chocolate mixture. Beat until smooth and fluffy.
 |
| See how few the ingredients are...:0 |
 |
| The prepared can, greased and lined with parchment |
 |
| Cakes just out of the oven |
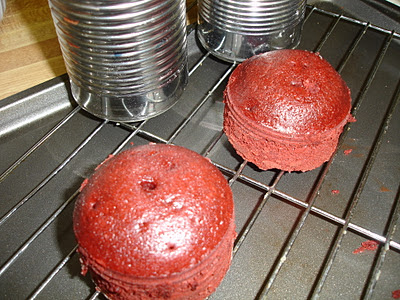 |
| See how small the cakes are...I even had balance of this for next day . Whats happening to my family these days. |
 |
| The cake was dense and moist.. |
No comments:
Post a Comment