Thursday, December 29, 2011

Saltine Toffee Bark


This easy Saltine Toffee recipe uses saltine crackers and a few common ingredients to make an uncommonly good candy that’s sweet, salty, crunchy, and chocolatey. You can make it more gourmet by adding chopped nuts or dried fruit to the top, or adding swirls of white or milk chocolate. I just made mine with crushed sliced almonds and saltines.  My kids went crazy for this.  Its sort of chewy and salty with hints of chocolate everywhere.

Ingredients

1.5 sleeves of saltine crackers
1 stick (4 oz) butter
1 cup packed brown sugar
2 cups chocolate chips

Method

  • Preheat the oven to 350 degrees. Prepare a baking sheet by lining it with aluminum foil and spraying the foil with nonstick cooking spray.
  • Arrange the crackers in a single layer on the baking sheet so that there are no empty spaces in between them. Crush any remaining crackers into small crumbs and set aside for now.
  • Place the butter and brown sugar in a small saucepan over medium-high heat. Stir while the butter melts, and bring the mixture to a rolling boil. Once boiling, carefully pour the sugar-butter mixture over the crackers on the baking sheet in an even layer, trying to cover most of the crackers. If you miss some spots, don’t worry as the toffee will spread in the oven.
  • Bake the toffee crackers at 350 degrees for five minutes, until the toffee is bubbling all over. Carefully remove the pan from the oven and allow to cool for one minute.
  • Sprinkle the chocolate chips on top of the hot toffee, and allow them to sit for one minute to soften and melt. Once softened, use an offset spatula or knife to spread the melted chocolate over the entire surface of the toffee in an even layer. While the chocolate is still sticky, sprinkle the top with the reserved crushed crackers.
  • Refrigerate the pan to set the toffee and chocolate for about 30 minutes. Once set, break into small uneven pieces by hand, and enjoy! Store uneaten saltine toffee in an airtight container for up to a week.

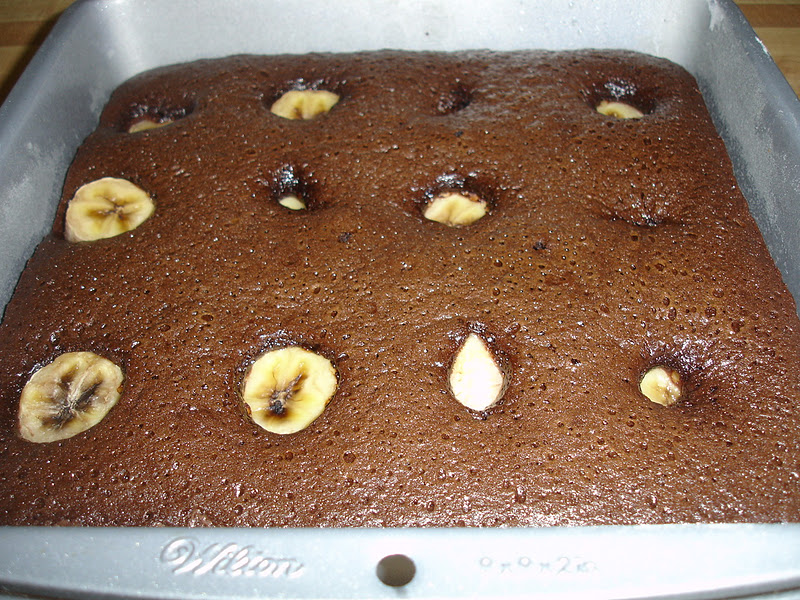
This is how the back of the bark looks...

Monday, December 26, 2011

Christmas Tree Ornament Cookie


I thought these cute little cookies made a nice ornament.  I made couple of these to give friends and also to hand up in my tree.  Next time I would use some vibrant hard candy.  The cookies are little hard on the day its made but becomes slightly soft the next day.  The different flavors of candy used here gives the cookie another layer of flavors.

Ingredients


1/2 cup (1 stick) butter
1/2 cup sugar
1/4 cup brown sugar
1 tablespoon molasses
1/2 teaspoon vanilla extract
1 egg
2 cups flour
1/4 teaspoon salt
3/4 teaspoon baking powder
30-40 hard candies (such as Life Savers), preferably in several flavors/colors


Method

  • Pre-heat oven to 375°F. Line two baking sheets with parchment paper or Silpat.
  • In a large bowl, using an electric mixer, cream together butter and sugars until fluffy, about 2 minutes. Add molasses and vanilla extract, mixing until incorporated. Add egg and mix until light and smooth, about 1 minute on medium speed.
  • Sift together flour, salt, and baking powder. Fold dry ingredients into wet mixture. Use electric mixer to blend just until flour is incorporated. Divide dough in half and flatten into two disks. Wrap disks in plastic wrap and refrigerate at least an hour and up to 2 days.
  • Remove any wrappers on candies and separate them by color into plastic bags. Using a mallet to crush candies.
  • Place one disk between two large sheets of waxed paper and roll to 1/4-inch thickness. Use cookie cutters to cut dough into desired shapes. Transfer cookies to prepared baking sheets, about 1 inch apart. Using a smaller cookie cutter or a knife, cut shapes into centers of cookies, reserving these center bits to add into extra dough.
  • Use a spoon to sprinkle the crushed candy into the hollowed-out centers of the cookies, filling to the edges. Try to keep the candy within the centers. Any candy specks that fall on the cookie will color the cookie.
  • If cookies will be hung as ornaments or decorations, poke a small hole in the top of each cookie before baking.
  • Bake 9 to 10 minutes. The candy should be melted and bubbling and the cookies just barely beginning to brown. Remove baking sheets from oven and place on wire racks to cool. Allow cookies to cool on pans at least 10 minutes; otherwise, the candy centers may separate from the dough. When cookies are completely cooled, remove and store in an airtight container. String with ribbon if you want to hang as an ornament.


Makes 2 to 4 dozen cookies, depending on how large you make them.


Friday, December 23, 2011

Brie and Chutney Phyllo


I guess the name explains it all.  This is a super easy and no brainer appetizer if you are in a rush to entertain. I found this wonderful tangy and sweet chutney in TJ Max and also I had some frozen prebaked phyllo cups.  I needed some kind of snack idea before the kids got home from school and this worked out fine.

Ingredients

Phyllo cups
You favorite chutney mix or any sort of preserves
Brie or any soft cheese

Lay all the phyllo cups on a sheet pan and preheat the oven to 350 degrees.  Top the cup with brie.  Put in the oven and bake for couple of minutes or until brie has melted slightly.  Take it out and top with 1/2 tsp of the fruit chutney and a mint leaf (optional)

Enjoy..


Wednesday, December 21, 2011

Reindeer Cake Pop

Doesn't he look sad..:(
I made these reindeer cake pop for my son's christmas party at school.  I enjoyed making this guys.  Some of the chocolate cracked slightly probably because I coated the chocolate on the cake balls while still cold. My oldest son enjoyed it so much that I had to hide some from him :)

Ingredients

Baked and cooled cake of choice
1/2 can of frosting
mini pretzel
lollipop stick
red candy for nose
Black foodsafe marker
chocolate candy melts

Baked cake....pretty

cake crushed and added frosting

rolled into balls

dip a lollipop stick into the chocolate melts and stick into the refrigerated cake pop
be careful not to push it all the way down

all the cake pop are ready to be dipped in a chocolate bath...yum yum

all dipped and ready to be decorated. I just forgot to get the food safe marker so I had tomake the mouth by using the candy color but I think it was not a good choice

All packed, ready for delivery :)

Monday, December 19, 2011

Cupcake Cake pops


I made these wonderful treat for my son's birthday party.  These are made with crumbled cake mixed with frosting and rolled then dipped in candy melts. I used a candy mould to get the baking paper effect. These mini cake pops is a hit with kids. The only downside with these cuties are ...they are so small that you wont even realise how many of these are popped into your mouth :)


Saturday, December 17, 2011

Chocolate Hidden Banana Cake

I wish I took a better picture....:(

These past couple of month has been so stressful since its almost year end and most every other month I will be down with depression.  I try to handle it with cooking and not thinking of what has been hitting me.  Things been pretty tough but I am slowly trying to shake it off.   I have not been cooking much and all that I mostly make are cake which recently I am trying to sell them too.  I do have couple of clients and its been really fun making cakes since it is what I love doing most.

We were invited for a dinner today and I made this banana cake which tastes awesome.  Come on, banana and chocolate; they are a match made.  Topped with ganache, unexplainable.  You have to try to see what I am talking about. I have always been a fan of banana cake but when I came across this recipe with a chocolate cake and ganache, I thought I would have to do it.

Before baking

After baking

Ingredients

30gm cocoa powder
59gm boiling water
37.5gm all purpose flour
37.5gm cake flour
1 tsp baking powder
½ tsp sodium bicarbonate
150gm sugar together.
1/8 tsp salt
2 large egg yolks
54gm corn oil
½ tsp vanilla extract.
2 large egg whites
A few bananas (hard to tell how many as bananas comes in all different sizes here, some are as long as 8 inches, some 2 inches)
This is the best chocolate cake I have done...its super moist eventhough kept in the fridge for 1 day

Method


  • In your mixing bowl, combine cocoa powder and boiling water to a smooth paste and set it aside, let it cool down.
  • Preheat your oven at 350 degrees.  Line a 9 inch square pan.
  • Combine all purpose flour, cake flour, baking powder, sodium bicarb, sugar and salt. Whisk it.
  • When the cocoa paste has cooled down, put in yolks and oil and beat on medium speed for 1 minute.
  • Put in vanilla and beat for a few seconds.
  • Put in half the dry ingredients (3) and beat on low speed until the dry ingredients are moistened. Put in the balance and beat on high speed for 1 minute.
  • Put in egg whites and whisk on high speed for 2 minutes.
  • Pour batter into lined pan. Cut bananas so that they stick out about 1 inch high from the batter. (I cut mine to short, cos I only had a few). Arrange them in a way so that when you slice the cake, each piece of cake will have one banana hidden.
  • Bake in preheated oven for 30 minutes, or until skewer comes out clean
  • Leave cake to cool for 10 minutes and remove from pan to cool down completely on cooling rack. Chill in fridge for 30 minutes, or just freeze it for 10 mins before frosting.


Topping

100gm semi sweet chocolate
100gm whipping cream

Heat whipping cream till small bubbles appear on the sides.  Pour the hot cream over  the chocolate.  Stir with a whisk till creamy and smooth.  Let cool completely and pour on top of the cake.  This frosting is enough to cover just the top of the cake.

Thursday, December 15, 2011

Yellow Sheet Cake

My youngest son turned 3 and he all he wants was a Robot cake.  I made a yellow cake with raspberry filling and used buttercream for the frosting.  The cake was moist even after 2 days.  I thought the robot looked cute even with some minor flaws.  The birthday boy had all the fun eating the candies.

Yellow Sheet Cake

Ingredients

2 ½ cups cake flour
2 tsp baking powder
½ tsp salt
1 ½ cups sugar
½ cup butter, softened
3 eggs
1 cup milk
2 tsp vanilla extract

My work space very very messy..

Method

Preheat oven to 350F. Line a 9×13 inch sheet pan with parchment paper, or lightly grease it with shortening or oil (butter will produce a harder “crust”).
Sift cake flour, baking powder and salt into the bowl of an electric mixer. Add sugar and, using the paddle attachment, mix on low speed to blend. Cut butter into 4 or 5 chunks and drop into the bowl with the flour. Blend on low speed until mixture looks sandy and no large chunks of butter remain, 1-2 minutes.
In a large measuring cup, combine eggs, milk and vanilla. Beat lightly with a fork until combined. With the mixer on low, pour 1 cup of the egg mixture into the bowl. Turn speed up to medium and beat for 1 ½ minutes. Reduce speed back to low and pour in the rest of the egg mixture. Continue to beat at low speed for an additional 30 seconds, until liquid is fully incorporated. Scrape down the sides of the bowl and beat for a few more seconds, if necessary.
Pour into prepared 9×13 pan and spread batter evenly with a spatula. Tap gently a few times to eliminate any bubbles.
Bake at 350F for 30-35 minutes, until a tooth pick inserted into the center comes out clean.
Let cool for 30 minutes in the pan before turning out onto a rack to cool completely. You can leave it in the pan if you’re serving it casually.


Tuesday, December 13, 2011

Kerala Beef Curry


This is the probably first time I am making beef curry.  I usually make stew with chuck roast but thought would make something spicy. Its really easy but the only thing that took time was making the meat tender.  I pressure cooker the meat with spices to tenderise it and then cooked in a wok to finish it.

Ingredients

2 lb beef chuck, cubed in chunks
1 tbsp coriander powder
1 tsp turmeric powder
1 tsp salt
1 tbsp garam masala
1 tsp chili powder
1 tsp vinegar
1 tsp ginger garlic paste

Pour some oil in a pan, add the marinated meat and sear it all over.  Once meat is seared, you can either cook on the same pot or put all the meat into a pressure cooker.  Add some water just to cover the meat slightly and cook till tender.

To saute

1 yellow onion, cubed small
1/4 tsp mustard seed
1/2 tsp ginger garlic paste
2 green chilli, cut in half
1 sprig of curry leaf
1 tbsp oil

Method


  • In a medium stir fry pan, add oil and the rest of the ingredients. Saute till onion is browned and then add the cooked meat and mix till all is evenly coated with the onion mixture.  
  • Add salt and a bit more of chili powder if you want it to be spicy.  At this point, you can add some cubed potatoes or leave it out.  Cook till the gravy is desired consistency.


Thursday, December 8, 2011

Black Forest Cake

You know what happens when you rush just to finish it so that you can have a bite of this wonderfully delicious moist cake....not finishing the piping of the whipped cream nicely.

This is another favorite of me and my mother's.  Whenever its our birthday, she would order this specially for us.  I love this since it uses fresh whipped cream which is not overly sweetened unlike the usual buttercream frosting.  Also in between the layer you will find black cherries halved and moistened with kirch.  This is truly a delicate cake which can be enjoyed with a glass of chambord. At least that is what I did..:)

Ingredients

33gm cocoa powder
59gm boiling water
37.5gm all purpose flour
37.5gm cake flour
1 tsp baking powder
½ tsp sodium bicarbonate
150gm sugar
1/8 tsp salt
2 large egg yolks
54gm corn oil
½ tsp vanilla extract.
2 large egg whites

Method
  • In your mixing bowl, combine cocoa powder and boiling water to a smooth paste and set it aside, let it cool down.
  • Preheat your oven at  350 degrees. Line and grease 2  6inch round pan or 1  8inch square pan.
  • Combine all purpose flour, cake flour, baking powder, sodium bicarb, sugar and salt. Whisk it.
  • When the cocoa paste has cooled down, put in yolks and oil and beat on medium speed for 1 minute. 
  • Put in vanilla and beat for a few seconds.
  • Put in half the dry ingredients (3) and beat on low speed until the dry ingredients are moistened. Put in the balance and beat on high speed for 1 minute.
  • Put in egg whites and whisk on high speed for 2 minutes.
  • Pour batter into lined pan.
  • Bake in preheated oven for 30 minutes, or until skewer comes out clean
  • Leave cake to cool for 10 minutes and remove from pan to cool down completely on cooling rack. Chill in fridge for 30 minutes, or just freeze it for 10 mins before frosting.


Frosting

400gm dairy whipping cream
3 Tbsp sugar
1 tsp gelatin
1 Tbsp water

Method
  • Freeze bowl for at least 15 minutes before use. If using stainless steel bowl, prepare and ice bath for use later.
  • Place water in a heat proof bowl and sprinkle gelatin onto water. Let it sit for 1 minute and melt it in the microwave(high for 30 secs) or over a hot pan of water. Let it cool down.
  • Remove frozen bowl from freezer (place in ice bath if stainless steel bowl) and pour in cold whipping cream. 
  • Beat on low speed until it starts to thicken then increase to high. When cream has reached soft peaks, put in sugar and beat until almost stiff. Pour in melted gelatin and beat until stiff.
  • Use immediately to frost.


    Sunday, December 4, 2011

    Robot Cake Pop

    He looks like a Martian than a Robot...but heck these guys are cute and yummy !

    These cake pops are becoming quite popular these days with kids and adults.  These are made with cake, crumbled and mixed with some frosting and then rolled and dipped in candy coating.  The rest of it is up to your imagination. I made these for my younger son's school for his birthday.  He wanted a robot cake which I will be doing soon but since the children are small I thought that the cake pops would be a good choice for them.

    Source: Bakerella

    Ingredients


    1  box cake mix
    1  (16-ounce) container ready-made frosting
    1  (1-pound) bag white candy coating morsels
    few drop of black candy coloring
    Lollipop sticks
    (Styrofoam block)
    Lifesavers
    Eyeball sprinkles
    M&M
    Bracelet Candy
    Sour Belts

    Method


    •  Bake cake according to package instructions. Allow cake to cool completely.
    • Cut the cake into quarters. Finely crumble each quarter of cake in a large bowl. 
    • Add half the container of frosting. Mix into cake crumbles until well combined. Mixture should stick together to form a ball, not too crumbly, not too wet. (Add more frosting, if needed.) Reserve remaining frosting for another use.
    • Shape cake mixture into 2-inch squares. Place on wax paper-lined baking sheet, cover and chill in fridge till firm. 
    • Carefully melt red candy coating in a deep bowl in microwave according to package directions. 
    • Dip 1/4-inch of a lollipop stick into candy coating mixture; insert the stick straight into the cake square on one end, almost half-way. Holding cake square at the surface of the candy coating, spoon coating evenly over cake square; and carefully tap off any excess. Work quickly, but not too forcefully or the cake ball will fall off the stick. Place end of stick in the Styrofoam block until sturdy and allow to dry. Continue with remaining squares.
    • Dip a toothpick into the coating and use like glue to adhere the Lifesavers as neck piece, eyeballs, yellow round sprinkles for nose, candy bracelet piece and pink diamond sprinkles for antennae, sixlets as ears and sour belt pieces as mouth.
    Yield: about 28-30 cake pops.


    I was laughing my head off thinking that I was suffocating the poor robot...


    Thursday, December 1, 2011

    Strawberry Cupcake


    I have been making a lot of these recently for my childrens teachers and friends.  Today I made these cutie's with strawberry.  I just love the little touch of sliced strawberry on top of each cupcake.  I have nothing much to say " as the saying goes, this picture says thousand words"...

    Source; Martha Stewart Cupcake


    Ingredients

    1 1/2 cups all-purpose flour, plus more for pans
    1 1/2 cups cake flour (not self-rising)
    1 tablespoon baking powder
    1 teaspoon salt
    1 cup (2 sticks) unsalted butter, room temperature, plus more for pans
    1 3/4 cups sugar, plus more for sprinkling fruit
    4 large eggs
    2 teaspoons pure vanilla extract
    1 1/4 cups milk
    10 ounces strawberries, hulled and cut into small dice, plus more for garnish
    Strawberry Meringue Buttercream

    ( I halved the recipe above )


    Method


    • Preheat oven to 350 degrees. Line 2 1/2 standard 12-cup cupcake pans with paper liners; set aside.
    • Into a medium bowl, sift together flours, baking powder, and salt; set aside.
    • In the bowl of an electric mixer fitted with the paddle attachment, beat the butter and sugar until light and fluffy, 3 to 4 minutes, scraping down the sides of the bowl as needed. Beat in eggs, one at a time, and then beat in vanilla. With the mixer on low speed, add the flour mixture in three parts, alternating with the milk and beginning and ending with the flour; beat until combined after each addition. Fold in strawberries.
    • Divide the batter evenly among the prepared cups so that each is about two-thirds full, about 2 ounces each. Bake, rotating the pans halfway through, until the cupcakes are golden brown and a cake tester inserted in the centers comes out clean, about 20 minutes. Transfer pans to a wire rack to cool for 5 minutes. Remove cupcakes from pan and cool completely on wire racks.

    Strawberry Meringue


    5 large, fresh egg whites
    1 1/4 cups sugar
    3/4 lb  butter, cut into cubes and cool, but not cold
    2 teaspoons pure vanilla extract
    1/4 cup (or to taste) strawberry puree OR a handful (about 1 cup, or more to taste) of fresh, washed, and dried strawberries, chopped
    pinch of salt
    few drops pink food colouring (optional)

    Method


    • If using strawberry puree, place a handful of frozen strawberries in a food processor, and process until a smooth puree. Measure approximately 1/4 cup and set aside (you may want to add more puree to taste).
    • Wipe the bowl of an electric mixer with paper towel and lemon juice, to remove any trace of grease.
    • Add egg whites and sugar, and simmer over a pot of water (not boiling), whisking constantly but gently, until temperature reaches 150°F, or if you don’t have a candy thermometer, until the sugar has completely dissolved and the egg whites are hot.
    • With whisk attachment of mixer, begin to whip until the meringue is thick, glossy, and the bottom of the bowl feels neutral to the touch (this can take up to 10 minutes or so). *Don’t begin adding butter until the bottom of the bowl feels neutral, and not warm.
    • Switch over to paddle attachment and, with mixer on low speed, add butter cubes, one at a time, until incorporated, and mix until it has reached a silky smooth texture (if curdles, keep mixing and it will come back to smooth). *If mixture is too runny, refrigerate for about 15 minutes and continue mixing with paddle attachment until it comes together.
    • Add vanilla and salt, continuing to beat on low speed until well combined.
    • Add strawberry puree to taste or the finely chopped strawberries, and blend until combined.
    • Add small amount of pink food colouring, if desired.


    Make Strawberry Meringue Buttercream and spread or pipe about 1/2 cup frosting on top of each cupcake. Garnish with strawberries, cut into halves, quarters, or left whole, depending on the size.