Monday, November 28, 2011

One Bowl dark Chocolate Cake


A simple get to the point cake which is so simple to bake.  Its a one bowl chocolate cake.  To dress up the cake I have layered it into 6 thin layer and sandwiched them with fresh whipped cream with some strawberry preserves.  And if thats not enough, I used ganache to top the final layer and let the chocolate drip to give it some drama.

The recipe below uses buttercream but I truly prefer whipped cream since it is not too heavy.

Ingredients

1 1/2 cups (180 g/6 oz) all-purpose flour
1 1/3 cups (275 g/10 oz) sugar
1/2 cup (60 g/2 oz) dark cocoa powder (I use Cacao Barry Cocoa Powder – Extra Dark)
1 1/4 teaspoons (6 g) baking soda
1 1/4 teaspoons (5 g) baking powder
1 teaspoon (5 g) salt
75 mL (2.5 liquid oz) vegetable oil
140 mL (5 liquid oz) buttermilk
130 mL (4.5 liquid oz) espresso or strong, hot brewed coffee
2 eggs, room temperature, lightly beaten
1 tablespoon (15 mL) vanilla

Three 6-inch round layers (to each be sliced in 2, yielding 6 thin layers)


Method


  • Preheat oven to 350° F (180°C). Prepare three 6-inch round cake pans with butter, parchment paper rounds, and cocoa powder. Tap out excess. 
  • In bowl of electric mixer, sift all dry ingredients. Add all remaining ingredients to bowl with the dry ingredients and with paddle attachment on mixer, mix for 2 minutes on medium speed (you may need the plastic splash-guard that comes with mixer) and pour into prepared pans. If possible, use digital kitchen scale and weigh pans for even layers. Batter will be liquidy.
  • Bake for 20 minutes and rotate pans in oven. Cakes are done when toothpick or skewer comes clean–approximately 30 minutes. Try not to over bake.
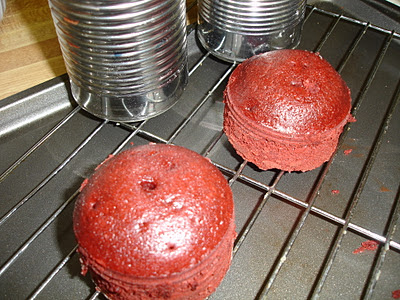
  • Cool on wire racks for 20 minutes then gently invert onto racks until completely cool.


Strawberry Swiss Meringue Buttercream ( 5 cups)


Ingredients

5 large, fresh egg whites (150 g/5 oz)
1 1/4 cups (250 g/9 oz) sugar
3/4 lb (3 sticks/340 g/12 oz) butter, cut into cubes and cool, but not cold
2 teaspoons (10 mL) pure vanilla extract
1/4 cup (or to taste) strawberry puree OR a handful (about 1 cup, or more to taste) of fresh, washed, and dried strawberries, chopped
pinch of salt
few drops pink food colouring (optional)

Sunday, November 27, 2011

Ta Ko


No, this is not your regular taco but its a dessert served cold.  It is very soft  and made with cornstarch, coconut milk and pandan juice, with little crunch from chopped water chestnuts.  My cousin once made this for me for our 1st wedding anniversary and since then I have been trying to get this recipe but only now I manage to find it.  Another interesting thing about this delicacy is that you make tiny casings out of screwpine leaves and then pour the cornstarch mixture into it.  I must say, the making of the casings was a challenge because here in US, we buy the frozen ones which are not broad.  The best ones to make this casings are the ones little broader.  Anyways, I manage to make the dessert which I have been dying to try for so many years...

If you want to try this and cannot find screwpine leaves or just do not have the patience to do it, by all means use small moulds or chinese tea cups.


Ingredients

Pandan Layer

25gm mung bean starch (green bean flour) or cornstarch
250ml pandan juice
60gm sugar
3 water chestnuts, peeled and chopped

Coconut layer

15gm mung bean starch or cornstarch
125ml water
125ml coconut milk
50gm sugar
Very small pinch of salt

Method

Prepare pandan layer. Mix everything together and cook on medium low heat until it looks transparent and thick.
Spoon over prepared casings.
Prepare coconut layer. Mix everything together and cook on medium low heat until it thickens. Taste, it should no longer taste floury.
Spoon over the pandan layer.
Let cool down to room temperature and it will harden. Best served when chilled.


Saturday, November 26, 2011

Guinness Stout Cake


I am sure everyone had the best Thanksgiving and a nice black Friday shopping. I was so thrilled that I finally got to make this cake that has so many raves from a lot of people.  What better time to make this than for a nice thanksgiving dessert to my friend's place.

I’ve been seeing Chocolate Stout Cakes here and there on other blogs, and I’ve always been intrigued, but never tried it. This is a rich, dense and moist cake made with, among other things, dark beer or stout, such as Guinness. The beer really just heightens of the chocolate-ness that’s going on and adds moisture to the cake, but I won’t lie–the dinstinct Guinness flavour is definitely present, however unexpectedly appropriate. It just all works (and trust me, you don’t need to be a beer drinker!) and to top it up, I made a cream cheese frosting with Bailey's Irish Cream.  If you are worried about children eating the cake, no worries. The alcohol in the cake evaporates leaving a nice dark distinct flavor and the Bailey's used for frosting has about the same level of alcohol as your regular vanilla.
Its a dense and moist cake

I just cant wait to make this cake again for another party.

Source:  Closet Cooking


Ingredients

1 cup (2 sticks) unsalted butter
1 cup stout (such as Guinness)
3/4 cup unsweetened cocoa powder
2 cups all purpose flour
2 cups sugar
1 1/2 teaspoons baking soda
3/4 teaspoon salt
2 large eggs
2/3 cup sour cream

Had to take a quick picture while everyone was in front having dessert. See how moist the cake is  on the inside.

Method


  •  Melt the butter in a sauce pan, remove from heat and let cool a bit.
  •  Mix in the stout and cocoa powder.
  •  Mix the flour, sugar, baking soda and salt in a large bowl.
  •  Mix the eggs and sour cream in another large bowl.
  •  Mix the stout mixture into the egg mixture.
  •  Mix the dry ingredients into the wet.
  •  Pour the batter into one or two greased and parchment lined circular cake pan(s).
  •  Bake in a preheated 350F oven until a toothpick pushed into the center comes out clean. If you bake it in a single pan then it should take about 40-50 minutes. If you  bake it in two cake pans then it should take about 20-30 minutes.

My wonderfully yummy Bailey's Irish Cream Frosting....yum yum

Wednesday, November 23, 2011

Char Kway Teow

My family will always request me to cook this noodle. Below is the most easiest way to whip up this meal for your next dinner.

Ingredients

200gm flat rice noodles
1 cup bean sprouts
1 handful of chinese chives, cut into inch long segments
1 egg
few prawns
few slices of sausages (optional)
2 Tbsp of cockle flesh (optional)
1 tsp finely chopped garlic
2 Tbsp (30ml) light soy sauce, about 1and 2/3 chinese soup spoon
Some pepper and cooking oil

Method


  • Do it plate by plate. Never fry in large amounts. Prepare everything in the portion you need before you start cooking.
  • Loosen rice noodles, make sure they don't clump together.
  • Heat wok until very hot. Put in little bit of oil, say about 1 tsp and fry prawns until fragrant. Dish up and set aside.
  • Put in more oil, say about 2 Tbsp and put in garlic. When garlic is fragrant, put in rice noodles.
  • Fry noodles until they look partially 'blistered' by the hot oil. It will be slightly sticky and won't take long if your wok is hot enough.
  • Put in little bit of beansprouts and chives. (The small amount of these 2 are cooked to release fragrance by the hot oil) Put in light soy sauce and pepper and continue to fry until the sauce dries up.  Push the noodles to the side once a while so that it gets heat and it quickens the drying process. Push it back in to the center and push it out again.
  • Push noodles to the side and put egg in the center. (add sausages at this point if wanted)Scramble it a bit and push noodles back onto egg. Toss everything.
  • When eggs are fragrant and noodles looks dry (it will have that 'blistered' look again), put in bean sprouts and chinese chives (add cockles if wanted). Toss and fry for a short while and dish up.

Serve with chilli sambal.


Monday, November 21, 2011

Roast Chicken


Thanksgiving is just round the corner.  Its been a year since we were in Colorado visiting family.  We had too  much of fun and really cannot wait to go back there to see them and also to visit the beautiful landscape. Its feels so peaceful up there in the mountains where you can see the peaks of the mountain covered with snow.

Since we are here and just to get the festive mood in, instead of roasting turkey, which my kids hardly eat, I roasted chicken for dinner. I know Thanksgiving is Thursday but we will be at a friends place so I thought it would be a good idea for me to just roast a chicken this week. I got this wonderful prepacked spice which will be my first time trying it.  I am glad I gave it a try..the spice pack was awesome. I also added some potatoes and onion mixed with the spice.

Ingredients

Mc Cormick Spice pack
1 Roasting Chicken
2 tbsp olive oil
1 tsp salt
4 potatoes, cut into fourth
1 yellow onion, cubed chunk

Method

Wash and pat dry the chicken.  Place on a roasting pan and rub liberally with the mixture of olive oil, salt and spice pack. Use any balance of the spice for the potatoes and onions too.  Place them around the chicken.  Bake at 450 degrees for about 1 hour. Check if chicken is cooked through by inserting a knife in the thickest part of the thigh, if juices run clear then it done. Enjoy...

Moist chicken just out of the oven
This is how my son likes his chicken served :)

Saturday, November 19, 2011

3D Dog Figurine Cake


This is the cake I talked about in the previous post.  I have been searching all over the internet for the details on how to do this cake but can you imagine there is no tutorial on this, however I was really lucky that a woman who did this few years back contacted me and emailed me the details on how to do this.  To assemble the cake did not take much time however the frosting was a pain.  Whenever I used the grass tip (234) to make the dog's fur, it kept falling off and I has to adjust it couple of times.  Overall, I am super happy with my first time ever 3d cake and also working with gum paste.

Cannot wait to do this cake again.

I made the blanket, nose, eyes and tongue with gum paste
Before frosting
Bone with fondant


Friday, November 18, 2011

Ruffled Cupcake


I must say that these couple of days I have been keeping myself busy; not that I have not been but you know the kind of busy where you attend to kids, husband, never ending chores and of course the desire to do what you have always wanted to do. In my case will be baking, cooking and knitting. I got few order's for my cupcake and a Dog figurine cake today  Well, the cupcakes are the norm which I always do but when it comes to doing a 3D cake, I am still on the verge of learning.  So, when my friend asked if I could do one for her boss, I said "of course", then I realised "oh my" what did I get myself into.

So, tonight I made the base for the cake and the chocolate buttercream frosting. I also made gumpaste nose and eyes. More on this cake coming up in the next post.

Okay now for my ruffled cupcake, I made a white cake and chocolate  cupcake filled with ganache cupcake frosted with buttercream frosting.  My friend specifically requested for blue frosting.  I am glad she did...I just love this sky blue.  I used tip 104 for the ruffles.


Thursday, November 17, 2011

Goat Curry


If you ask me what is my ultimate favorite meat...it will be goat or lamb.  I just love it grilled or cooked in spices but of course these are the things that cannot be consumed on a weekly affair.  So whenever I cook these kind of meat, I try to jazz it up with spices.  Goat curry is especially tasty the next day when you reheat them.  We love to have them with white rice or sometimes my hubby likes to dip bread in it.

The way to cook this meat cannot be any simpler.  The key to have a soft tender meat is to use a pressure cooker but of course if you dont have one, the meat can be cooked the regular way. I used my pressure cooker to get the meat tender faster, then I added it to the wok and cooked the rest of the way on the stove top.

Ingredients

Goat meat, cut into chunks ( I used about 2 lb)
2 big red onions, cubed
3 tomatoes, cubed
Ginger garlic paste
1/2 tsp turmeric powder
1/2 tsp cumin seed
1 sprig of curry leaf
1 cinnamon stick
2 star anise
4 cardoman pods
5 clove
1/4 tsp fennel seed
1/2 tsp sugar
Black pepper and salt
Cilantro
Method

Put the meat with turmeric powder, salt, cumin and ginger garlic paste in a pressure cooker and cook for about 5 minutes depending on your pressure cooker.  This is if you are using the cooker or else follow the method below.

In a clean wok, over medium heat; add some vegetable oil, cardamon pods, star anise, fennel seeds, cloves, cinnamon stick and curry leaf.  Once you hear the popping sound add cubed red onions and a pinch of salt.  Stir and let it cook for couple of minutes until onions are translucent and slightly browned.
Once onions are browned slightly, add the cubed tomatoes and saute for couple of second till it softened.
Add the meat (without the liquid from the pressure cooker), red chili powder, meat curry powder and salt. Stir well and add about 3 tbsp of the cooked liquid or just add some water.  Cover and let it cook for about 35 to 40 minutes depending how tender you want the meat to be. Skip this long process if you have used the pressure cooker to tenderise the meat.  Stir occasionally so that the meat does not get burned.  If you need more liquid to cook it, add the leftover liquid or water; little at a time.
Lastly add 1/2 tsp sugar, black pepper and chopped cilantro. Let it cook for about 5 minutes.  At this point the gravy should be dry and the meat properly cooked.  Adjust the seasoning.

Note:  I have adjusted the seasoning and spiciness to our preference but if you want it to be spicier, please add more chili powder.

spices- cardamon, cinnamon, star anise, cloves, fennel


Tuesday, November 15, 2011

Butter Cake


I wish I took a better picture of this butter cake.  This cake does not need any frosting or glaze for it to stand out but by all mean this cake can be decorated with buttercream or whipped frosting. This is a  true good old fashion butter cake that has been handed down by my family.  I usually make this for gatherings and cut them up in small pieces so you can enjoy it without guilt.  Definitely make sure to use the best butter you can get.  It makes all the difference.  I made two different colors.  One I used a green and marbled it and the other was red.

Ingredients

250gm self raising flour
1/4 tsp salt
2 stick butter, room temperature
250gm sugar (I used only about 220)
4 eggs
1 tsp vanilla
2 tbsp or more milk

Method


  • Preheat oven to 350 degrees. Grease and line a 8in round or square pan with parchment paper.
  • Beat butter and sugar until light and fluffy.  Add the vanilla extract. 
  • Beat in the eggs one at a time making sure that it is blended well after each addition.
  • Slowly add in the sifted flour and salt.  If the batter seems to be too thick, add in about 2 tbsp of milk. Stir well and pour the batter into the prepared cake pan.
  • Bake for about 40 minutes depending on your oven.  Test with a wooden skewer, take it out and let it sit for 5 minutes then turn it onto a cooling rack.

Just out of  the oven


Monday, November 14, 2011

Daisy Cupcake


I made some cupcakes for a friend today. I made these cute daisies out of Gum Paste.  The cupcake is a yellow cake with chocolate buttercream frosting.


Sunday, November 13, 2011

Mini Cashew Toffee Crunch Chocolate Torte


Dont be drawn back looking at the pic...my old camera gave up on me and this is the best pic I can get....phewww

I must say that I had the most fun today making this individual torte.  Its baked in a petite loaf pan, makes a decent 5 slice.  Its super decadent and has the most unique flavor with bits of toffee in between.  I am surely going to try doubling this recipe for a get together.  The length of time taken to do this could easily be doubled for another loaf pan.

This will be my another sweet attempt in using the "Small Batch Baking" book.  Since my kids are getting bored of all the bakings that I have been recently doing, I cannot find a better way to experiment and eat it too by making small batches.  Maybe someday they will miss my cakes and beg me to do more. Till then dear visitors have fun looking at these small, mini desserts.

Source: Small Batch Baking

Ingredients

1 ounce fine quality semisweet chocolate, chopped
1 1/2 ounce fine quality unsweetened chocolate, chopped
1 1/2 tbsp unsalted butter, plus butter for greasing pans
3 tbsp flour
1/8 tsp baking powder
1/8 tsp salt
1 large egg
1/4 cup sugar
2 tsp heavy whipping cream
1/2 tsp vanilla
1/2 cup dry roasted cashew, finely chopped
2 tbsp toffee bits

Ganache, recipe follows

Method


  • Preheat oven to 325 degrees. Lightly butter a petite loaf pan ( 2 cup capacity) about 5 x 3 inches. Line the bottom of the pan with foil allowing the ends hanging down lengthwise.  Lightly butter the foil and dust with flour and tapping out excess. Set pan aside.
  • place the chocolate and butter in a small microwave bowl and microwave in medium power until soft.  Stir well until smooth and set aside to cool.
  • Whisk together the dry ingredients and set aside.
  • Place the egg, sugar, cream and vanilla. Beat with a handheld mixer till mixture has lightened for about 30 seconds. Add the cooled, melted chocolate mixture and beat on medium speed until blended about 5 seconds.  Fold in the flour mixture with a rubber spatula until no streaks remain.  Pour the batter into the loaf pan.
  • Bake until the toothpick inserted in the center comes out clean approximately about 45 minutes. Transfer to wire rack an cool for 20 minutes.  Unmould the cake.  Clean the pan and line it now with parchement paper with sides extending over the pan.
  • Prepare the ganache according to the recipe.
  • Measure out 1/3 cup of the Ganache and set aside.  Stir the cashews and toffee bits into the remaining Ganache.
  • Cut the cake horizontally into three layers using a sharp knife. Place the bottom layer of the brownie cake, cut side up in the bottom of the lined pan.  Using a rubber spatula, spread half of the cashew  Ganache mixture and top with another layer of the cake. Spread remaining cashew Ganache mixture and top with the final cake layer pressing down gently.  Refrigerate for about 1 hour.  Using the ends of the parchement or foil, pull the cake out of the pan and place on a plate.  Spread the reserved Ganache over the top and sides of the cake.  Refrigerate for about another 1 hour.  Cut into slices while cold and serve room temperature.

Ganache

4 ounce semisweet chocolate, chopped
1/2 cup whipping cream
1 tbsp unsalted butter
1 tbsp sugar

Place the cream, butter and sugar in a small saucepan. Bring to a simmer over medium heat, stirring until sugar melts.  Remove from heat, and pour on top of the chocolate in a bowl.  Let stand 1 minute, then stir until smooth.  Let cool to room temperature.


Saturday, November 12, 2011

Mini Red Velvet Cake

It was pretty tough decorating a small cake..but I had so much fun doing it
I stumbled upon this book when I was at the library and was very interested in knowing how easy can it be to make a mini, one serving cake versus a regular 8 inch sized cake.  I thought that the preparation almost took the same amount of time as the regular ones I always make but just for curiosity sake I went ahead making it. Well, taste wise it was okay. As for me, I think eventhough this takes a bit of time separating the eggs and also measuring it out to tablespoons, getting the batter into the can without touching the sides and so on but it is wonderful when you can just devour and taste different varieties of cake  and not worrying too much about having leftovers from a big cake.

Have fun making...

Source: Small Batch Baking


Ingredients

Unsalted butter for can
3 tbsp buttermilk
1 1/2 tbsp well beaten egg
1/2 tsp red food coloring
1/2 tsp vanilla extract
1/4 cup plus 2 1/2 tbsp all purpose flour
1/3 cup plus 1 tbsp sugar
1 1/2 tbsp unsweetened cocoa
1/8 tsp baking powder
1/8 tsp baking soda
1/8 tsp salt
2 tbsp unsalted butter, softened
Method for the cake

Preheat oven to 350 degrees. Lightly butter the inside two 14.5 ounce cans lightly and dust them with flour.  Line the bottom with parchment paper.  Place the cans on a baking sheet for easier handling and set aside.

Place the buttermilk, egg, food coloring and vanilla in a bowl, whisk to blend.

Combine the flour, cocoa, baking soda, baking powder and salt in a small deep mixing bowl.  Using a handheld beater, beat on low speed to combine.  Add the butter and half of the buttermilk mixture;  beat on low speed until the dry ingredients are moistened. Increase the speed to medium and beat until batter has lightened and increased in volume, about 45 seconds.  Scrape the sides of the bowl.  Pour in the remaining buttermilk mixture and beat on medium speed until well blended about 20 seconds.

Scrape the batter into the prepared cans.  Bake for about 30 minutes or until a toothpick comes out clean when inserted. Let cool 10 minutes on a wire rack.

Invert the cans and remove the cakes.  Cut into half crosswise using a sharp knife; frost between the layers  and on top and sides of the cakes with the White Chocolate Cream Cheese Frosting.


White Chocolate Cream Cheese Frosting

2 tbsp whipping cream
1 ounce white chocolate, chopped
3 ounce cream cheese, room temp
2 tbsp unsalted butter, room temp
1 1/2 cup confectioner sugar
1/2 tsp vanilla extract


Method

Place the cream in a small microwave safe cup; microwave at high until hot about 15 seconds.  Add the white chocolate. Let stand for 1 minute and stir till smooth. Cool.

Beat the cream cheese and butter in a small bowl on high speed using handheld mixer until smooth.  Add the confectioner sugar, vanilla and the melted chocolate mixture.  Beat until smooth and fluffy.


See how few the ingredients are...:0
The prepared can, greased and lined with parchment
Cakes just out of the oven
See how small the cakes are...I even had balance of this for next day . Whats happening to my family these days.

The cake was dense and moist..


Wednesday, November 9, 2011

Cake for Fun


I had the most horrible day today.  I made two 6 inch cake which took me longer than usual to bake. Then when I was about to turn it to the wire rack..gosh it broke in half.  Then when I turned the other one, it broke again.  Gee, I was in trouble. I had to make another cake soon so that it can cool down for me to frost it .

Quickly going through the cookbooks that I have, came across this recipe from Martha Stewart so I decided to go ahead and make it.  Well, the cake came out perfect but then it came to frosting the cake to a perfection and then going over it with a paper towel to smooth it out. I also torte the cake and filled it with store bought bavarian cream. All this was getting to me, I was running out of time. Finally I made it through. Overall I think I came up with a pretty good cake despite what went on.

Source: Martha Stewart

Ingredients


12 tablespoons (1 1/2 sticks) unsalted butter, room temperature, plus more for pans
2 1/2 cups all-purpose flour (spooned and leveled), plus more for pans
1 tablespoon baking powder
1 teaspoon salt
1 3/4 cups sugar
2 large eggs, plus 3 large egg yolks ( I used 4 whole eggs instead)
1 teaspoon pure vanilla extract
1 cup milk
1/4 cup raspberry preserves or Bavarian Cream

Bavarian Cream filling

Method


  • Preheat oven to 350 degrees, with rack in center. Butter two 8-inch round cake pans; line bottoms with parchment paper. Butter paper; dust with flour; tap out excess. In a large bowl, whisk flour, baking powder, and salt; set aside.
  • Using an electric mixer, in a large bowl, beat butter with 1 cup sugar until light and fluffy. Add eggs and yolks, one at a time, beating well after each addition. Add vanilla; beat until combined.
  • Alternately add flour mixture and milk, beginning and ending with flour mixture; beat just until combined. Divide batter between prepared pans.
  • Bake cakes side by side (not touching), rotating pans halfway through, until a toothpick inserted in center comes out clean, 25 to 30 minutes. Cool in pans 10 minutes. Run a knife around edge of pans. Invert cakes onto a cooling rack; remove parchment. Cool completely, upside down. (Wrap in plastic, and store at room temperature, up to 1 day.)
Frosting

I made buttercream frosting with:

1 cup shortening
4 cups confectioner sugar
1 tsp clear vanilla
1 tsp almond extract
8 tsp water/milk

In a stand mixer fitted with paddle attachment, cream the shortening, vanilla and almond extract. Slowly add the powdered sugar and teaspoon's of water. Cream till it is smooth.


Sunday, November 6, 2011

Hershey's Perfectly Chocolate Cake


I am super excited today since I had to made a cake for a friend.  She gave me a short notice and as usual the computer being my loyal friend, I browse through and came upon this recipe from Hershey's.  It is an easy recipe. All you have to do was mix all the dry ingredients together and the liquids in another bowl.  I am always looking for easy methods since I saw this, I quickly rushed into the kitchen and whipped up this wonderful cake. The batter was really really watery.  The final result was a  really moist cake. This will be my go to recipe for a chocolate cake.


Source:  Hershey's

Ingredients

2 cups sugar 
1-3/4 cups all-purpose flour
 3/4 cup HERSHEY'S Cocoa 
1-1/2 teaspoons baking powder 
1-1/2 teaspoons baking soda 
1 teaspoon salt
 2 eggs 
1 cup milk 
1/2 cup vegetable oil 
2 teaspoons vanilla extract 
1 cup boiling water

 Method
  • Heat oven to 350°F. Grease and flour two 9-inch round baking pans. 
  • Stir together sugar, flour, cocoa, baking powder, baking soda and salt in large bowl. Add eggs, milk, oil and vanilla; beat on medium speed of mixer 2 minutes. Stir in boiling water (batter will be thin). Pour batter into prepared pans. 
  • Bake 30 to 35 minutes or until wooden pick inserted in center comes out clean. Cool 10 minutes; remove from pans to wire racks. Cool completely. Frost and decorate.

Frosting Recipe from Williams Sonoma (This is the best frosting I have ever had)


8 oz. unsweetened chocolate, chopped
6 cups confectioners' sugar
16 Tbs. (2 sticks) unsalted butter
6 Tbs. milk, plus more, if needed
2 tsp. vanilla extract
1/4 tsp. salt

Method

Have all the ingredients at room temperature.

Put the chocolate in the top pan of a double boiler set over but not touching simmering water in the bottom pan. Stir until the chocolate is melted and smooth. Let cool to room temperature.

In the bowl of an electric mixer fitted with the flat beater, combine the confectioners' sugar, butter, the 6 Tbs. milk, the vanilla and salt and beat on low speed until combined, about 1 minute. Stop the mixer and scrape down the sides of the bowl. Increase the speed to medium and beat for 2 minutes, then reduce the speed to low. Add the chocolate and beat until combined, then increase the speed to medium and beat for 1 minute more.

If the frosting is dry, add more milk, 1 tsp. at a time, until it is creamy but still holds peaks. Makes about 4 1/2 cups.


VARIATIONS

ONE-PAN CAKE: Grease and flour 13x9x2-inch baking pan. Heat oven to 350° F. Pour batter into prepared pan. Bake 35 to 40 minutes. Cool completely. Frost.

THREE LAYER CAKE: Grease and flour three 8-inch round baking pans. Heat oven to 350°F. Pour batter into prepared pans. Bake 30 to 35 minutes. Cool 10 minutes; remove from pans to wire racks. Cool completely. Frost. 

BUNDT CAKE: Grease and flour 12-cup Bundt pan. Heat oven to 350°F. Pour batter into prepared pan. Bake 50 to 55 minutes. Cool 15 minutes; remove from pan to wire rack. Cool completely. Frost.

CUPCAKES: Line muffin cups (2-1/2 inches in diameter) with paper bake cups. Heat oven to 350°F. Fill cups 2/3 full with batter. Bake 22 to 25 minutes. Cool completely. Frost. About 30 cupcakes. 

Thursday, November 3, 2011

Pandan Kaya Layer Cake


I used to always get this cake from our local bakery when I was a little kid.  Then it was all forgotten till I recently stumbled upon this recipe.  The method looks pretty tedious but since I really crave for this cake and wanted to see if I could make this, I got myself a store bought sponge cake mix from the Asian Grocery.  Baked it as per the package.  Set it aside. Then went ahead to make the jelly part, which I was hoping should come out good. To assemble it was another task that I have to encounter as I had no idea how to do it but just went with my instinct.  After keeping the cake in the fridge for couple of hours, then it came to getting it out of the pan, I was praying that it has to just pop out of the pan....I run a knife through the sides, turned it onto a plate and walla it just pop right out of the pan. To my surprise when I cut a slice of the cake, it was perfect.  Exactly how I pictured it to be.  Taste wise since I used a store bought sponge mix, it was okay..the next time I would definitely use the recipe below for the sponge cake.


Ingredients

4 large eggs
130gm sugar
100gm flour + 1/2 tsp baking powder, sifted
50gm coconut milk
80gm corn oil
1/2 tsp pandan paste.
Green food colouring
I did not put too much coconut.
  • Preheat oven to 350 degrees. I used an 8 inch round pan. DO NOT GREASE THE PAN.
  • Beat eggs and sugar until thick and pale.
  • In a separate bowl, combine coconut milk, pandan paste/green colour and corn oil. Put in sifted flour and mix.
  • Put a few table spoonful of beaten eggs into the flour mixture and fold. Repeat 3X.
  • Pour the flour into remaining beaten eggs and fold. Take care not to deflate the eggs.
  • Pour into prepare mould and bake for 30 minutes.
  • Remove cake from mould immediately after baked. Leave to cool (cake will shrink tremendously, but uniformly) and slice into 3 layers. Freeze (air tight and separate layers with baking paper) until use.

Pandan Layer

  1. 2 cups water + 200gm sugar. Cook sugar until dissolved. Leave to cool down. Do this in advance.
  2. Mix 50gm cornstarch and 1 tsp pandan paste into 150gm coconut milk. Set aside
  3. Bring 2 cups water + 1 tbsp agar-agar powder to a simmer.
  4. Pour in (2) into (3) and cook until mixture thickens and boils. Remove from heat.
  5. Pour (1) into (4) and combine well.
The filling layers could have been thicker but since its first time, I just added little. The next time definitely I am going to add more filling

To assemble

  • I used the same size pan that I baked the cake. If u want to assemble it upside down, then put 1/3 of the pandan layer in first, then cake, then another 1/3, then 2nd layer cake and the last 1/3 of pandan layer and last layer of cake.
  • If u want to do it upright, then cake in first, then 1/3 pandan, then 2nd cake and pandan and cake again and pandan layer.
  • Chill in fridge till cold and set. Decorate with some icing and dessicated coconut.


Wednesday, November 2, 2011

Idli


You know my cooking is a very get to the point kind and I dont like to sweat it out by confusing myself since I have my small one running and constantly needing me.  I made some batter for Dosa couple of days ago and today I was thinking of making Idly with that batter. Idly is a pillowy soft cakes cooked in a special steamer and served mainly with chutney powder or sambar (lentil soup) for dipping. This dish is usually served for breakfast or dinner in many Indian house and also on special occassions. Many recipes call for soaking the lentil and rice seperately and grinding them seperately  but since I did not have the time to do things one at a time, I just ground them together and still got a good result.  Here is my super basic recipe.

Ingredients

1 cup urad dhal
3 cup raw rice ( I used Ponni Raw Rice) or use parboiled rice
A pinch of  fenugreek seed
1 tsp salt
a fistful of cooked rice (or a little less)

  • Soak the rice and lentil in different containers for at least 6 hours.  Grind the rice, dhal and cooked rice with the soaked water to a thick batter.  Add in the salt. Give it a good mix with your hands.  If you feel the place you live is fairly cold then you can add 1/4 tsp yeast.  This is to help with fermentation of the batter.  Cover the bowl and leave it in a warm place for at least 8 hours.
  • After the batter has fermented fully, you will notice there is a strong odor as if the batter is spoilt.  No worries, this is how it should be. Then laddle the batter into the special Idli mould and steam for about 15 minutes.  Serve while still warm.

Tuesday, November 1, 2011

Layered Mini Chocolate Mousse Cake


Today I made a mini Chocolate Mousse Layer cake that is simple to make, relatively quick and super chocolatey provided you dont have a 2 year old running around the kitchen and doing everything that you do.

The cake's sponge layers are moist but not too tender.  You need some structure (like a genoise) so that it can hold up the mousse filling and not dissolve into a soggy mess. This cake is chocolatey but not overly rich or too sweet. It employs quality dark chocolate and tastes somewhat like a soft truffle. Next time I would probably use my swiss roll recipes for the cake layer and top it with chocolate mousse.

I used two 6-inch round pans to bake the cake layers.  Then I used parchement paper folded 1/2 inch broader in circle than the cake and taped it so it will look like a ring mould. I just did not want to get fancy gadgets for just one time use.

Ingredients

Sponge Cake Layers (makes two 6-inch layers)

60 g unbleached all-purpose flour
15 g cocoa powder [I used dark, dutch-processed]
75 g sugar
4 large eggs, room temperature
1 tsp melted unsalted butter

Cocoa Syrup

75 mL water
10 g cocoa powder
10 g sugar

Chocolate Mousse Filling

150 g dark chocolate, chopped
300 mL whipping cream, cold
30 mL confectioners sugar
5 mL pure vanilla extract
8 g powdered gelatine
30-45 mL water to bloom the gelatine

Decoration

dark chocolate shavings or chocolate curls


Special Equipment

2 6-inch/15.24 cm round cake pans [I used Wilton], lined with parchment circles and sprayed with Pam or Baking Spray
1 adjustable ring mold, or a 7 inch/17.78 cm metal springform pan, optional or use parchement paper folded into a ring

Method

  • Sift the flour and cocoa powder together in a bowl
  • Preheat oven to 350 degrees.  Have oven racks set in the middle.
  • In a a small custard cup, soak the gelatine with the water until soft.  Place in microwave and “zap” it for 10 seconds.  Remove and stir until dissolved.  Continue to heat for a few seconds at a time until the gelatine is clear and not lumpy anymore.  You may need to add a few teaspoons of water to help this if you cannot get rid of the lumps.
  • Prepare in a small saucepan, the cocoa syrup.  Heat the sugar, cocoa powder and water until the sugar dissolves.  Stir well and allow to cool.

Sponge Layer


  • Beat the eggs in a stand mixer with a whisk attachment until foamy.  Add the sugar and continue beating until pale and thick.
  • Sift the flour and cocoa powder into the egg mixture.  Fold gently from the bottom up to avoid deflating the bubbles.  Add melted butter and fold well.
  • Equally distribute the batter between the two 6-inch cake pans.  Bake in a preheated 180°C/356°F oven for 15-20 minutes.  The cake will pull away slightly from the edges of the pan when you bring it out.
  • Turn the cake out while still hot.  Leave it to cool on a rack.


Chocolate Mousse Filling
  • In a double-boiler, melt the chocolate, stirring occasionally until smooth.   Add the bloomed gelatine to the melted chocolate and continue to stir over the heat until it is combined well with the chocolate.  Allow to cool
  • In a stand mixer with the whisk attachment, pour in the cold whipping cream, confectioner’s sugar and vanilla and whisk until soft peaks form.
  • Take a portion of the whipped cream with a hand whisk and lighten the chocolate mixture in a small bowl.  Then, pour the chocolate mixture into the bowl of whipped cream and fold with the whisk until combined.  Do not overmix.  Just gently incorporate until no white streaks appear.


ASSEMBLY


  • Split one sponge cake layer for this recipe.  Wrap the other one for another recipe or use both the cake.
  • Lightly brush the Cocoa Syrup on the split layers.
  • On your serving platter or parchment-lined sheet pan, set the adjustable ring mold at 7 inches.  Centre one layer of the sponge cake in the middle, leaving a 1cm perimeter around the cake layer.  Pour half the chocolate mousse filling over the cake layer.  Use a small metal spatula to gently coax the filling around the perimeter of the cake so as to touch the sides of the mold.  You can gently tap the mold, holding it firmly down while doing so, to ensure that you do not get air pockets.
  • Gently place the second cake layer on the mousse filling and ensure it is in the centre of the mold.  Pour the rest of the mousse filling over this cake layer  ensuring that the mousse doesn’t leave air pockets around the perimeter of the cake layers.  Smooth the top.  Refrigerate until set.
  • To serve:  Remove the ring mold carefully using either a hot towel or hair dryer to heat the sides of the ring mold until the mousse is able to loosen easily from the mold.  Release the mold and carefully remove.  If you find little bumps on the sides, heat your small metal spatula in hot water, wipe bone-dry and use the heat of the spatula to smooth the bumps.  You can do this all around the edge of the cake to ensure a finished appearance.  This isn’t so important if you intend to decorate with chocolate shavings or curls.  Press the chocolate shavings into the sides of the cake and sprinkle generously over the top.