Friday, June 10, 2011

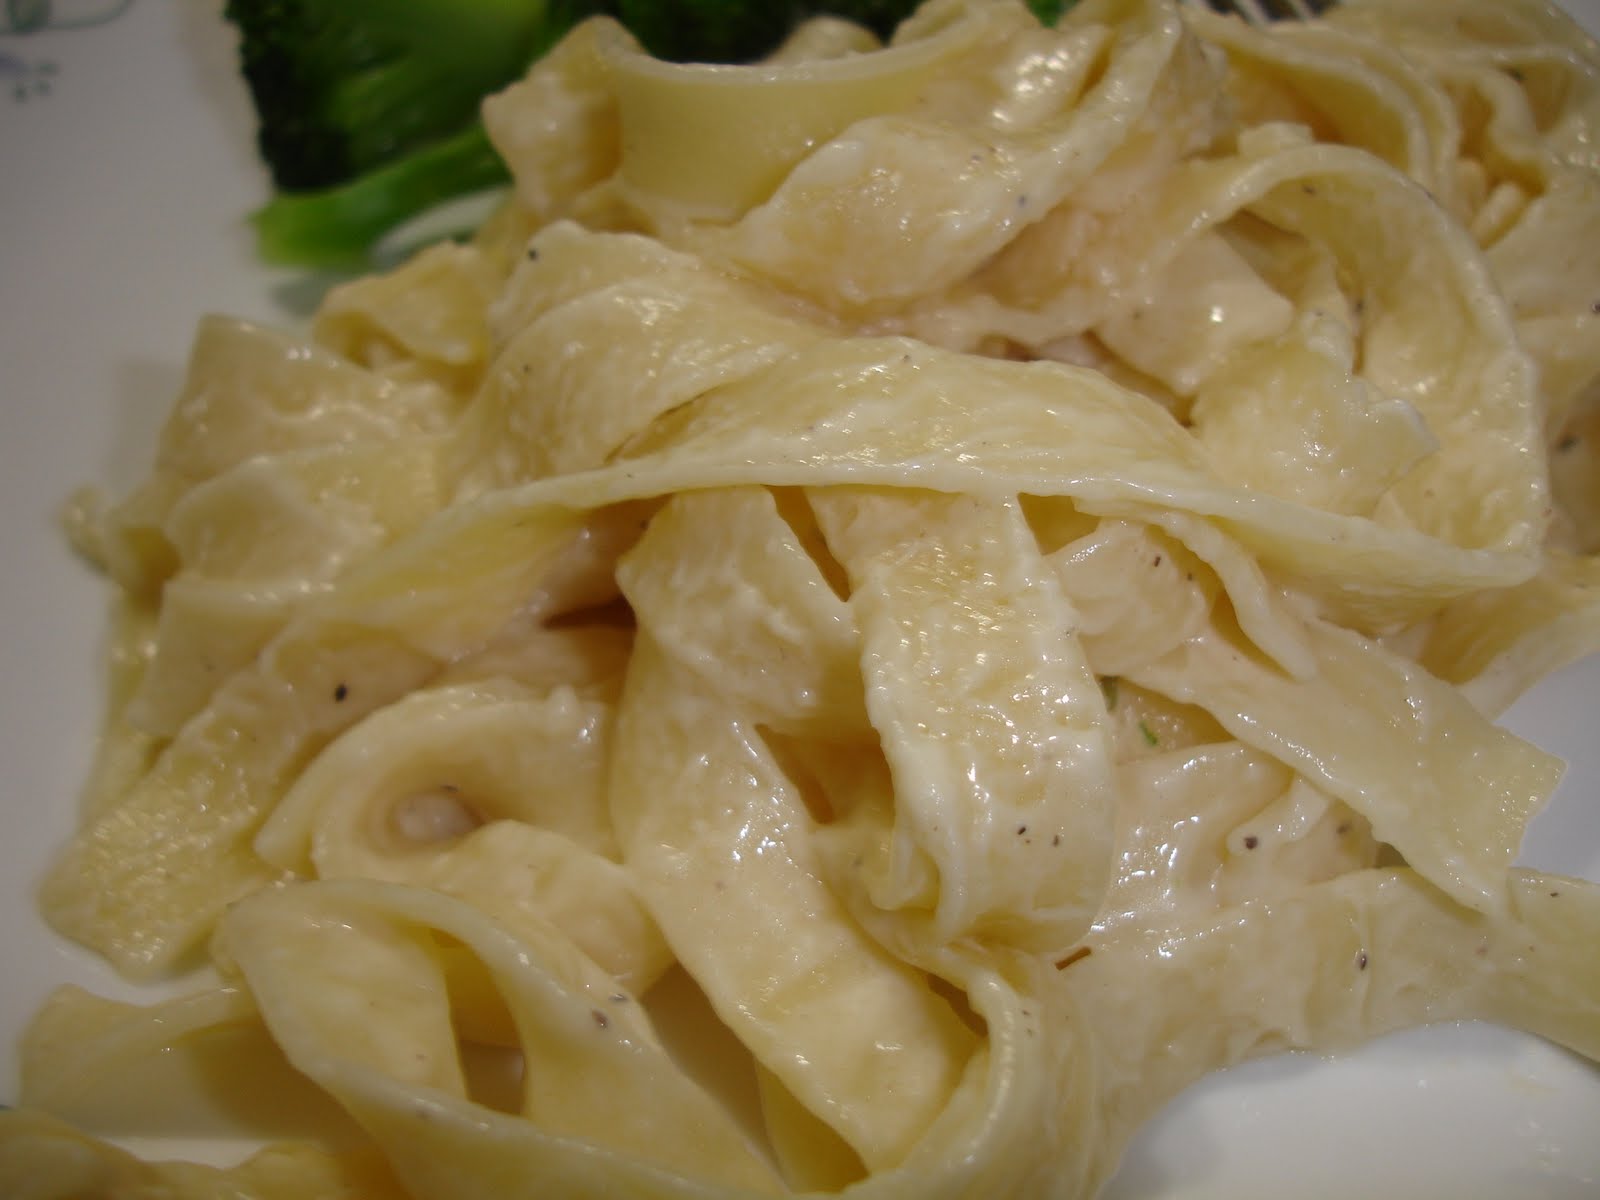
Fettuccine Alfredo

I have always wanted to make Alfredo sauce but never was able to go through it after seeing all the butter and cream used for this sauce but sometimes in life we just gotta do what we want to for a long time.  Now I am so happy today that I have actually finally made the Alfredo sauce which I have been dreading for a long time.  Now I can sleep peacefully...

I found these fancy nest shaped fettuccine at the grocery store but they never stayed  like a nest after cooking...
Alfredo sauce.  Yummmo with all the extra calories
the end result....a good looking handsome pasta.

Ingredients

  •  1 pound Fettuccine Noodles
  • 1 stick Butter
  • 1 cup Heavy Cream
  • Salt and Pepper, to taste
  • 2 cups Freshly Grated Parmesan Cheese

Method

Cook pasta according to package directions.
In a saucepan or skillet, warm butter and cream. Season with salt and freshly ground black pepper.
Grate Parmesan cheese and place half of it into a large serving bowl. Pour warm butter/cream mixture over the top.
Drain pasta and immediately pour it into the bowl.
Toss a couple of times, then sprinkle in the other half of the Parmesan.
Toss to combine, thinning with pasta water if necessary.
Serve immediately as a main course or accompaniment to meat or salad.


Wednesday, June 8, 2011

Whole Wheat Pizza Knots


When I came across this recipe, I knew that I had to try it immediately and this is the most amazing soft rolls eventhough I used whole wheat flour, yummm. I love garlic bread and this is sort of turning the whole wheat pizza dough into garlic knots..The dough was a little sticky . Although nothing beats kneading bread by hands, some dough are super sticky and its easier to be done in a bread machine.

Source:  Takeamegabite

Ingredients
  • 1 packet active dry yeast
  • 1 cup warm water
  • 1 1/2 cup all purpose flour ( I used approximately about 1 1/4 cup flour)
  • 1 cup whole wheat flour, fine grind
  • 2 tbsp olive oil
  • 1 tsp salt
  • 2 tsp sugar
For the garlic mixture

  • 4 cloves garlic, minced
  • 2 tbsp butter, melted
  • 2 tbsp olive oil
  • 1/4 cup chopped parsley
  • 1/2 tsp sea salt

Note :  This dough can also be made as pizza dough.  Instead of cutting into strips, roll out into a circle and top with marinara sauce and topping.

Directions

In a small bowl, dissolve yeast and sugar with warm water.  Let sit for 5 minutes until yeast is frothy.  That means it’s alive and ready to go.
In a large bowl, whisk together flours and salt.  Create a small well in the center of the flour mixture.  Pour in the yeasty water and add oil.  With a fork, mix the wet ingredients into the dry ingredients.  If the dough is too sticky, add more all-purpose flour.  Dough should be slightly sticky, but not stick to your hands too much.
Knead dough on a lightly floured surface for about 5 minutes.  Place dough in a large greased bowl.  Flip the dough over to coat the dough.  Cover with plastic wrap and a clean kitchen towel, and leave to rest in a warm, draft-free place for 1 hour, or until the dough is doubled in size.  At this point, you can make the garlic knots, or let the dough rise in the refrigerator overnight.  Just bring the dough to room temperature before rolling it out.
When ready to prepare the garlic knots, roll out dough on a lightly floured surface.  Roll into a 10-inch by 10-inch square.  Roughly….   Use a pizza cutter to slice 10 1-inch stripes.  Tie a knot in the center of the dough, and wrap the ends under and around the knot.  This doesn’t have to be perfect either… just make sure that the dough is all tucked into itself.  Cover with clean kitchen towel and let rest for 30 minutes.
Place racks in the center and upper third of the oven and preheat oven to 400 degrees F.   Line two baking sheets with parchment paper.  Place dough knots on prepared baking sheets and bake for 15 to 18 minutes, until golden brown.
While bread bakes, in a large bowl whisk together minced garlic, butter, olive oil, parsley and salt.  When rolls come out of the oven, immediately toss them in the garlic butter mixture.  Toss until coated and remove from the butter bowl.  Serve rolls warm.
Rolls are best served the day they’re made, but will last for 3 days if well wrapped.  Just reheat in a piece of foil in a 350 degree F oven for 10 minutes.


Monday, June 6, 2011

Brownie Tart


The unique and striking part of this tart is the addition of polka dots filled with chocolate ganache. This recipe definitely takes the brownie out of the realm of casual food and makes it an elegant dessert.
This brownie tart  itself has deep flavor and fudgy texture. Its flavor is also highlighted by addition of cream cheese.

Source:  Joy Of Baking

Ingredients

3 oz semi sweet or bittersweet chocolate, chopped into small pieces
1 cup walnut, toasted and chopped into pieces
14 tbsp (200gm) unsalted butter, cubed
1/2 cup unsweetened cocoa
1 1/4 cup granulated sugar
3 eggs
2 tsp pure vanilla extract
3 oz regular cream cheese, cut into pieces ( do not use fat free)
1/2 cup of purpose flour
1/4 tsp salt

Ganache

2 oz choc chip
1/3 cup heavy whipping cream

Method

Preheat oven to 325 degrees. Grease or spray with nonstick vegetable spray a 9 inch fluted tart pan with a removable bottom, line the bottom of the pan with parchment paper.


In a heatproof bowl, placed over a saucepan of simmering water,  melt the butter and chopped chocolate. When the chocolate has melted transfer the mixture to a larger bowl.
Beat in (I use a hand mixer) the cocoa, then the sugar, into the chocolate mixture, until incorporated. (If you are doing this by hand, use a whisk.) Add the eggs, one at a time, beating well after each addition. Scrape down the sides of the bowl as needed. Beat in the vanilla and then beat in the cream cheese, until small pieces remain. Add the flour and salt and mix by hand just until the flour is incorporated. Stir in the nuts.
Place the tart pan onto a large baking sheet to catch any drips. Pour the batter into the tart pan and spread it evenly with an offset spatula or the back of a spoon. The batter will fill the pan almost to the top.
Bake for about 30 to35 minutesor until the batter has set. If you insert a toothpick about 1 inch (2.5 cm) from the edge of the pan it should come out clean. Remove from oven and place on a wire rack to cool for about 5 minutes. Then, with the end of a wooden spoon (1/2 inch diameter) (1.25 cm) that is well greased (I spray it with Pam), make holes (spacing them evenly about 1 inch (2.5 cm) apart) into the top of the brownie tart. As you insert the end of the wooden spoon into the tart twist the spoon to prevent the tart from tearing. You should have about 25-30 small holes. Then, with a small spoon fill the holes with the ganache. The ganache will sink as it cools so add more ganache, as needed. Let the tart cool completely and then cover and refrigerate. It is best to make this tart the day before serving to allow the flavors to blend. This tart will keep in the refrigerator for about two to three weeks.

Make little holes on top and fill with ganache.


While the tart is baking make the Ganache

Place the chopped chocolate in a small heatproof bowl.  Set aside.  Heat the cream in a small saucepan over medium heat.  Bring just to a boil.  Immediately pour the boiling cream over the chocolate and allow to stand for 5 minutes.  Stir until smooth.


Bloom

My white rose just had the first bloom today.  I am super excited since my plants never get pass for more than 1 month,  probably its the hot weather that we are having these days that has been helping them. We have been getting some really hot weather up here in central lately.  The heat index today went almost to 100 degrees.  We were also in ozone alert today...can u imagine.  Took the kids to the pool to cool off.  I just had to get my mind of from the miserable weather, so I thought I would make myself a brownie tart.  I know, I should have just made some lemonade but right now its brownie time.


Jasmine

Sunday, June 5, 2011

Strawberry Topping


I made this wonderful strawberry topping for my waffles.  Its a little runny since I was as usual rushing to taste it even before I can get it to thicken up a little.  Any how, the taste was really awesome.  It was even better once I cooled it in the refrigerator.

Ingredients

2 cup Strawberries (loosely packed; fresh or frozen)
1/8 cup white sugar
1 teaspoon cornstarch (disolved in a little water)
Instructions
  • Cut strawberries into halves or quarters (depending on preference; if the strawberries are fairly small you may leave them whole).
  • Place strawberries in a saucepan and pour sugar on top and place on burner set between medium and medium-low.
  • The mixture will slowly become watery at which point you can set the burner to medium. Once the mixture begins to boil add dissolved cornstarch while stirring the mixture.
  • After boiling for 1-2 minutes (remember to continue stirring) you can remove from the burner.

The syrup can be used hot or can be refrigerated and used cold, depending on your preference.
Note:  Add a small amount of lemon juice to give it a slight tang especially to strawberries that are bland or certain store bought kinds.

Saturday, June 4, 2011

Vacation in Mineapolis

We drove about 7 hours and had the most amazing vacation in Minnesota. We stayed at the Mariott and drove the next day for about 2 hours away to Lake Superior, Duluth.  This is the largest freshwater lake. It was such an exciting trip driving up to the Lake.  We were not dressed for the weather as we thought it would not be so cold but to our amazement it was freezing cold in June.  Well, I guess the winds blowing from the lake made it even worst but it was so awesome to hear the waves hitting by the rocks that were lined up by the sides of the lake.   We had our lunch at Grandma's Restaurant, referred by locals there.  We walked around and visited the Freshwater Aquarium, Museums and Galleries.  This was surely an exciting trip that we will be visiting again.


Beautiful waves at the back...


After spending about 5 hours there, we headed back to another well known attraction in Mineapolis, The Mall of America. My kids were definitely fascinated by the first thing they laid their eyes on......Nickelodeon Universe.  Yes, they played and rode all the rides the entire evening....and wanted to go back for more the next day.  I had so much of fun window shopping.  

Now.....time for planning the next vacation.


Whole Wheat Pasta with Spicy Sausage


When we went for our vacation to Duluth, we spoke to some locals and we were strongly recommended to go to Grandma's restaurant and we tested a few different kinds of food there.  I particularly loved this spicy sausage penne with marinara sauce.  It was so light that you dont feel stuffed after eating it.  So I tried re-creating this simple dish by making my own marinara and using Johnsonville hot sausage and of course lots of basil.  I think I came pretty close to the taste.

Ingredients

2 - 8 oz can of tomato sauce
1 - 28 oz can crushed tomato
1 -6 oz can tomato paste
3 cloves garlic, minced
1 tbsp sugar
2 tbsp red wine vinegar
2 tsp oregano
Basil
pinch of red pepper flakes

Note:  I browned spicy Johnsonville sausages and later added it to the sauce and simmer it with the sauce for about 20 minutes on low heat.

The measurement above can be altered to suit your taste.

Method


In a large skillet, add little olive oil and saute garlic.  Add the crushed tomatoes, tomato paste, tomato sauce, sugar, vinegar, oregano and red pepper flakes. Stir all together and simmer over low heat for at least 30 minutes (for the best flavor). Add in the basil leaves. Stir frequently to prevent burning.


Another variation I did was using the same marinara sauce but made some meatballs spiced with italian spices, garlic powder, onion powder, red pepper flakes, water and crushed cornflakes. Rolled them into balls, browned on a skillet and added to the sauce.
  

Friday, June 3, 2011

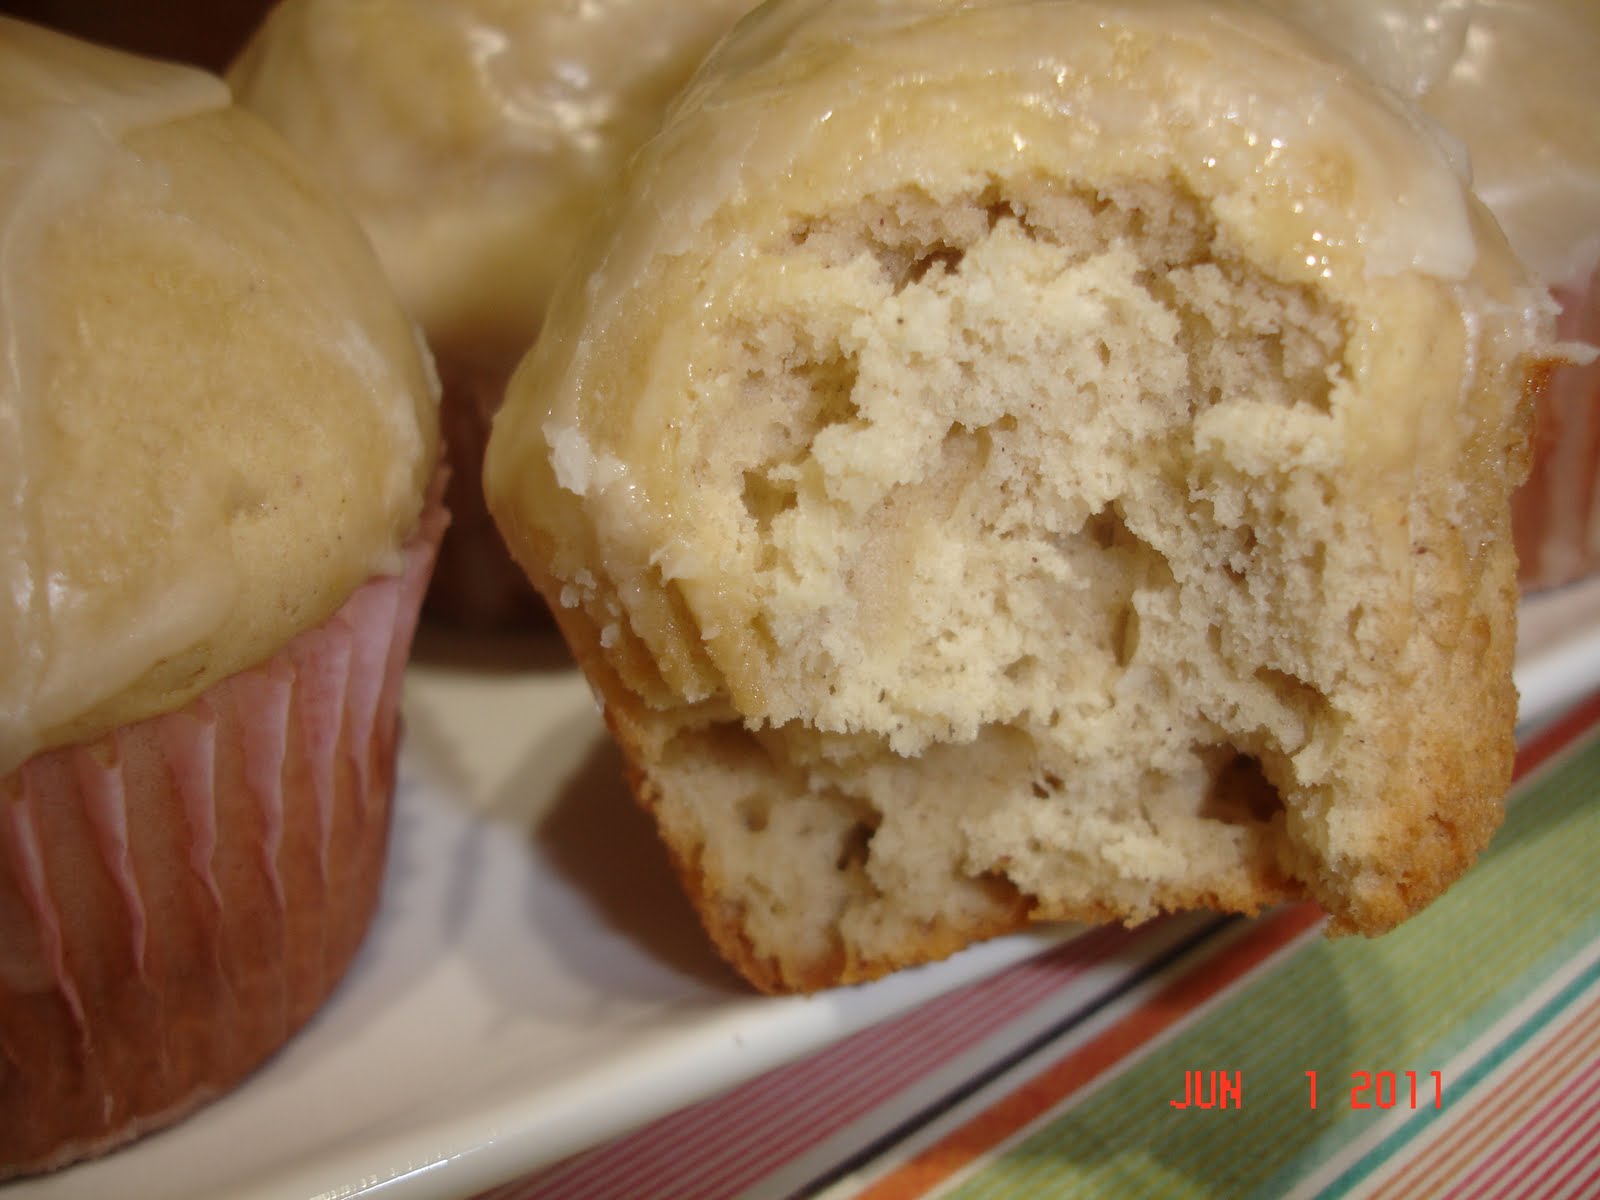
Glazed Doughnut Muffin


This basic muffin is not your stir-it-gently, dense, fruit-and-nut-filled health muffin. Instead, it's a beat-it-up, cake-type muffin, high-crowned and very "vanilla-looking." This is a great muffin for anyone who don't want a lot of "stuff" in their muffins. With its basic sugar-cinnamon-nutmeg flavor, it's more reminiscent of a plain doughnut (without the deep-fat frying) than anything else.

As plain as it is (which is just the way some people like things), it's a good candidate for additions of dried fruit and/or nuts to the batter, as well as a garnish of flavorful jam or preserves when serving time rolls around. I just glazed it with basic glaze.


Source:  King Arthur Flour


Ingredients

  • 1/4 cup butter
  • 1/4 cup vegetable oil
  • 1/2 cup granulated sugar
  • 1/3 cup brown sugar
  • 2 large eggs
  • 1 1/2 teaspoons baking powder
  • 1/4 teaspoon baking soda
  • 1 to 1 1/4 teaspoons ground nutmeg, to taste
  • 3/4 teaspoon salt
  • 1 teaspoon vanilla extract
  • 2 2/3 cups  all purpose flour
  • 1 cup milk

Directions


  • Preheat the oven to 425°F. Lightly grease a standard muffin tin. Or line with 12 paper or silicone muffin cups, and grease the cups with non-stick vegetable oil spray; this will ensure that they peel off the muffins nicely.
  • In a medium-sized mixing bowl, cream together the butter, vegetable oil, and sugars till smooth.
  • Add the eggs, beating to combine.
  • Stir in the baking powder, baking soda, nutmeg, salt, and vanilla.
  • Stir the flour into the butter mixture alternately with the milk, beginning and ending with the flour and making sure everything is thoroughly combined.
  • Spoon the batter evenly into the prepared pan, filling the cups nearly full.
  • Bake the muffins for 15 to 17 minutes, or until they're a pale golden brown and a cake tester inserted into the middle of one of the center muffins comes out clean.
  • Remove them from the oven, and let them cool for a couple of minutes, or until you can handle them. While they're cooling, melt the butter for the topping (this is easily done in the microwave).
  • Use a pastry brush to paint the top of each muffin with the butter, then sprinkle with the cinnamon-sugar. Or simply dip the tops of muffins into the melted butter, then roll in the cinnamon-sugar.
  • Serve warm, or cool on a rack and wrap airtight. Store for a day or so at room temperature.


Wednesday, June 1, 2011

Carne Asada


Carne Asada, which is actually roasted or barbequed beef is thinly sliced and is served either with spanish rice or tortilla and accompanied with fresh guacomole, grilled onions, black beans, sour cream and fresh salsa. The most popular kind of meat used for this dish is Flank Steak and marinated for couple of hours in such ways as rubbed with olive oil and sea salt or with spice rubs such as lemon and pepper or garlic salt and lime juice.


Source:  Simply Recipes


Ingredients


2 pounds flank or skirt steak
Olive oil
Kosher salt and freshly ground black pepper

    Marinade
    4 garlic cloves, minced
    1 jalapeƱo chile pepper, seeded and minced
    1 teaspoon freshly ground cumin seed (best to lightly toast the seeds first, then grind them)
    1 large handful fresh cilantro, leaves and stems, finely chopped (great flavor in the stems)
    Kosher salt and freshly ground black pepper
    2 limes, juiced
    2 tablespoons white vinegar
    1/2 teaspoon sugar
    1/2 cup olive oil

Method


 Lay the flank steak in a large non-reactive bowl or baking dish. Combine marinade ingredients and pour the marinade over the steak. Make sure each piece is well coated. Cover in plastic wrap and refrigerate for 1-4 hours.


Preheat your grill over medium-high flame (you can also use a cast iron grill pan on high heat for stove-top cooking). Brush the grates with a little oil to prevent the meat from sticking. Remove the steak from the marinade. If you are cooking indoors, you may want to brush off excess marinade as the bits may burn and smoke on the hot pan. Season both sides of the steak pieces with salt and pepper. Grill the pieces for a few minutes only, on each side, depending on how thin they are, until medium rare to well done, to your preference. You may need to work in batches. Remove the steak pieces to a cutting board and let rest for 5 minutes. Thinly slice the steak across the grain on a diagonal.
(Optional) Serve with warm tortillas (flour or corn). Warm the tortillas for 30 seconds on each side in a dry skillet or on the grill, until toasty and pliable. Alternatively, you can warm tortillas in a microwave: heating just one or two at a time, place tortillas on a paper towel and microwave them for 15 to 20 seconds each on high.