Showing posts with label Eggs. Show all posts

Sunday, June 4, 2017

Berries Angel Food Cake


For the first time today I tried making angel food cake.  Its pretty simple compared to all the complicated ones that I have done and whats the best thing is that it does not use any oil :)

Ingredients

3/4 cup egg whites ( I used 5 eggs)
1/2 cup + 2 tbsp flour
3/4 cup sugar
1/4 tsp salt
1/2 tsp cream of tartar
1/2 tsp vanilla esence
1/4 tsp almond essence
1 tsp Lemon juice


Method

Separate the egg whites in a clean bowl.  In a another bowl sift the flour with half of the sugar.  Set aside.

Beat the egg whites till frothy.  Add the cream of tartar, salt and beat.  Gradually add the lemon juice and sugar gradually and beat till peaks form and it looks glossy.  Do not overbeat.  Finally add the flavorings.

Slowly stir in the flour.  Do not overmix.

I made mine in 2 4in angel food pan and 6 cupcakes

Bake at 350 degrees for about 40 min and test with wooden skewer for doneness.  Turn it upside down and let it cool.


Saturday, October 10, 2015

Vietnamese Pork and Egg with rice


I am not a big fan of pork and I rarely cook them.  When my cousin sent me the picture of this dish that she made and told me how delicious it was, I could not resist making it.  Hoping and praying that my family will like it too.

When I first marinated the pork in fish sauce, the house started to smell fishy and funky.  My kids were asking me what the yucky smell was !  I was even more skeptical to try this but went ahead anyways.  The verdict - YUMMY !


Ingredients

Pork steak
Ground pepper
3 tbs vegetable oil
4 eggs
2 tomatoes, sliced
1 cucumber, sliced

Marinade:

3 tbsp fish  sauce
1 tbsp white sugar
1/4 tsp tumeric
2 garlic cloves, finely grated

Dressing:

3 tbsp white sugar
3 tbsp fish sauce
2 tbsp white vinegar
2 garlic  cloves, finely chopped
1 long red chilli, de-seeded, finely chopped
2 tbsp lime juice


Method:


  • In a large bowl, whisk together the marinade ingredients. 
  • Lay the pork on a chopping board and cover with baking paper and pound the steaks until they are .5cm thick
  • Place the pork in the marinade and toss to coat.

  • To make the dressing, heat the sugar, fish sauce, vinegar over high heat. for 2-3 min. Stir the garlic, chili, and lime juice. Set aside. 

  • Heat 1 tbsp of oil in a large non-stick frying pan and cook the pork 3-5 min on each side in batches until thoroughly cooked. Remove from heat and rest.
  • While pork is resting,  heat the remaining 2 tbsp of oil and fry the eggs to your liking.
  • Serve with rice, pork, fried egg, tomatoes and cucumber.. top it off with generous spoonfuls of the dressing.


Muffin Tin Egg Omelette


Another super easy way to make omelette for breakfast ahead of time.  All the ingredients that you use for an omelette is cubed and mixed and baked....easy as ABC.


Ingredient

Eggs
Half and Half or whole milk
Bell pepper, cubed small
Ham, cubed small
Mushroom, cut into small piece
Onion, cubed
Cheddar cheese, shredded
Salt and Pepper

Method

Preheat oven to 350 degrees.

Spray a muffin tin. In a small pan, saute onions, bell pepper and mushroom. Take it out.
Get eggs and beat them slightly with a splash of milk.  Add salt and pepper.
In the greased muffin tin, layer the vegetables, cheese and beaten egg.  Top with more cheese if desired.
Bake for about 20 minutes or until the eggs have puffed up.
Serve...

Thursday, June 20, 2013

Mini Bacon and Spinach Quiche

These quiche are a quickie to make and if you need to bring something for a potluck or just for snack, I would surely recommend making this. You can add anything as a filling but I though the spinach actually gives color and tastes really good with bacon bits.

Used a ready made pie crust. Cut into 2 inch round and place in a greased mini muffin tin.

Use your favorite quiche recipe. I added bacon bits and spinach.

Bake at 350 degrees for about 25 minutes or nicely browned on the bottom.


Thursday, May 16, 2013

Pandan Custard Buns


I am going bun craze these past days.  The top layer on the buns are made with custard flour, cooked and piped on top.  The buns itself I used some pandan paste to flavor it.  They are super soft and tastes really good.  Again I used my Kitchenaid dough hook to mix up the dough.


Ingredients

Bread

350gm bread flour
200ml water
50gm sugar
1/2 tsp salt
3 tsp yeast
1 tsp bread improver, optional
20gm coconut powder
1 tbsp. milk powder
1 egg
30gm butter, softened
1 tsp pandan paste

Custard

1 tbsp. flour
4 tbsp. sugar
1/4 tsp salt
1 tbsp. custard flour
250 ml milk
1 tbsp. butter

Method

Following the bread machine method, add the liquid, egg,  sugar, dried ingredients, make a little hole on top of the flour and add the yeast. Using the dough hook of the kitchenaid mixer, mix the dough till soft but still a little sticky.  Add additional flour by tablespoons till you get the right texture.  I sometimes never use all the flour stated in the recipe.  Mix for couple of minutes.

Grease a bowl, put the dough in it and cover.  Let rise till double for about 60 minutes.  Punch dough down and divide into small balls and put in a greased baking pan.  I used my pyrex dish. Let rise for about 30 minutes.

Bake at a preheated oven for about 25 minutes.

Make the custard while the dough is rising the first time.  In a pot, add the ingredients for the custard except butter, whisk and cook in low heat till it is thick.  Take it off the heat and add the butter.  Whisk really well. Let it cool.  Put in a piping bag and pipe swirls on top before baking the buns.


Sunday, April 21, 2013

Egg Custard Tart


Ingredients of crust

225 gm plain flour
125 gm butter
55 gm icing sugar
1 egg, whisked
a dash vanilla extract

Ingredients of custard

3 eggs
110 gm caster sugar
225 gm hot water
85 gm evaporated milk
1/2 tsp vanilla extract

* This crust is more like a cookie crust


Method
  • Place butter at room temperature until softened. Cream the butter and sugar with an electric mixer over medium speed until the mixture is smooth, fluffy and light in color.
  • Add in whisked egg, half at a time, beat over low speed. Add vanilla extract, mix well.
  • Sift in flour in two batches, scraping down the sides of the bowl between additions with a spatula, and make sure all ingredients combine well. Knead into dough. (see picture)
  • Roll out the dough to a 1/2 cm thickness. Cut dough with a cookie cutter that is just a bit smaller than your tart tin in size. Line dough in the middle of tart tins, one by one. Lightly press the dough with your thumbs, starting from the bottom then up to the sides. While pressing the dough, turn the tart tin clockwise/anti-clockwise in order to make an even tart shell. Trim away any excess.
  • Method (making custard): 
  • Add sugar into hot water, mix until completely dissolved.
  • Whisk egg with evaporated milk. Pour in sugar water. Mix well.
  • Sift egg mixture to get rid of any foam into a tea pot. Carefully pour egg mixture into each tart shell.
  • Method (baking tarts): 
  • Preheat oven to 200C. Position rack in lower third of oven. Bake tarts for 10 to 15 minutes until the edges are lightly brown.
  • Lower the heat to 180C. Keep an eye on them. Once you see the custard being puffed up a bit, pull the oven door open about 2 to 3 inches. Bake for another 10 to 15 minutes until the custard is cooked through. Just insert a toothpick into the custard. If it stands on its own, it’s done.


Monday, October 17, 2011

Kuih Bangkit


I remember my mother in law making this for chinese new year but I just craved for this and tried making it on my own.  Kuih Bangkit is a traditional Chinese New Year cookies and it is made mainly from tapioca flour, eggs and coconut milk. It is a cookie that is hard on the outside but melts in your mouth. This is one cookie that has quite a long shelf life compared to other cookies like Pineapple Tarts. It can be kept for about 2 months if stored in airtight container.  Trying using good quality coconut milk.

Ingredients

2 1/2 cups tapioca flour/tapioca starch
1 Tbp. butter, melted
1 egg yolk (from large egg)
1 cup icing sugar
120ml thick coconut milk (or coconut cream)

Bangkit mould

Method


  • Place a paper towel on a microwave safed bowl, add the tapioca flour and microwave for 1 minute. Set aside and let it cool. (You can fry the flour in the wok if you don't have a microwave.) 
  • Microwave extra tapioca flour for standby (to flour the surface) and kneading purposes.
  • Sift tapioca flour and icing sugar in a big bowl. Add melted butter, yolk & coconut milk. Knead until the dough is pliable. (If the dough is wet or soft, add more tapioca flour, 1 Tbp. at a time and knead until it becomes a harder dough. Likewise, if it's too dry, add more coconut milk).
  • Roll out the dough on lightly floured surface to about 3mm thickness. Cut into shapes with a cookie cutter (Or you can use the kuih bangkit mould (this required longer baked time). Arrange on lined baking tray and bake at 350'F for 15 minutes. It will puff when baked.


Friday, October 14, 2011

Pumpkin Expresso Ice Cream


This ice cream, without a doubt, is one of the best ice creams I’ve ever made.  It’s super creamy and full of all the flavors you’d expect to find in a pumpkin spice latte.  I love how the espresso and pumpkin both stand out and how the fall spices add subtle background flavors to the ice cream.  You might think that the ice cream would be slightly gritty because of the amount of espresso and spices, but I can assure you it’s not.  If you like pumpkin spice lattes, you will love this ice cream.


Ingredients

2 cups heavy cream
1 1/2 cups half and half or whole milk
2 tablespoons instant espresso powder
1 1/4 teaspoons ground cinnamon
1/2 teaspoon ground nutmeg
1/4 teaspoon ground ginger
1/8 teaspoon ground cloves
4 egg yolks
3/4 cup granulated sugar
1 cup pumpkin purée

Makes about 1 1/2 qt


Method

  • In a medium saucepan over medium heat, whisk together the heavy cream, half and half, espresso powder and spices and bring to a simmer. Meanwhile, using a hand mixer on medium speed, beat the egg yolks and granulated sugar together until the mixture becomes light in color and falls from the beaters in ribbons.
  • Remove one cup of liquid from the cream mixture and gradually pour into the egg yolk mixture, beating the entire time, to temper the eggs. Add tempered egg mixture back to the saucepan and whisk well. Add the pumpkin purée and continue to whisk until the mixture is smooth. Reduce heat to medium-low and continue cooking until the custard has thickened and coats the back of a wooden spoon.
  • Transfer the custard to a large mixing bowl, preferably one with a pour spout, and cover with plastic wrap, pressing the plastic wrap against the surface of the custard. Chill for at least two hours, or overnight. Freeze the custard in an ice cream maker according to manufacturer’s directions. Once the ice cream has reached soft serve consistency, transfer to an airtight container and freeze for 3-4 hours, or until ice cream has hardened. To make the ice cream easily scoopable, allow it to sit at room temperature a few minutes before serving.

Wednesday, October 12, 2011

Green Tea 'Matcha' Ice Cream


I had some leftover green tea powder and was thinking of ways to use it up when I thought how an ice cream would taste like with green tea.  It has a unique taste to it unlike other regulars which we always have. I just added a hint of vodka to keep the ice cream smooth and some chopped pecan for bite which is totally optional.

Source: The Perfect Scoop by David Lebovitz


Ingredients

1 cup whole milk
¾ cup sugar
Pinch of salt
2 cups heavy cream
4 tsp. matcha (green tea powder)
5 eggs


Method

Combine the milk, sugar and salt in a medium saucepan.  Heat over medium heat until warmed through.  Meanwhile pour the heavy cream into a large bowl and whisk in the matcha.  Set a fine mesh sieve over the bowl.
In a separate medium bowl, whisk the egg yolks until smooth.  Whisking constantly, slowly pour the warmed milk mixture into the bowl with the egg yolks.  Return the entire mixture to the saucepan and continue to cook, stirring constantly and scraping the bottom of the pan, until the mixture thickens slightly, you can check this by making a line at the back of the spoon and if the lines remain separated then its done.   Immediately remove from the heat and pour the mixture through the mesh strainer into the bowl with the cream mixture.  Whisk the mixture vigorously to dissolve the green tea powder.  Cover and chill in the refrigerator.

Once the mixture is thoroughly chilled, transfer it to an ice cream maker and freeze according to the manufacturer’s instructions.


Sunday, October 9, 2011

Light Chocolate Pot De Creme


I know, the name sounds really big but ‘Pot de Crème’ [poe duh krem] is simply a fancy shmancy French way of saying pot of custard and believe me this is a super easy dessert.  It is velvety smooth, light and fluffy and best of all, its individual dessert that you can enjoy just for yourself.  I especially loved it because it has my favorite, chocolate. The ingredients are super easy to put together and the Pot de Creme can be made ahead of time infact it needs to be in the fridge for at least 2 hours before serving so that it can set up and can be kept for over 24 hours.

Source: Moms Kitchen Handbook


Ingredients

3 ounces bittersweet chocolate
1 cup low-fat milk
½ cup heavy cream
¼ cup sugar
2 egg yolks
1 whole egg
1 teaspoon vanilla extract

Method

  • Preheat oven to 325°F. Arrange six 4-ounce heatproof ramekins in a deep baking dish.
  • Shave, grate or finely chop the chocolate and put it in a medium bowl.
  • Combine the milk, cream and sugar in a small saucepan and cook over medium-high heat until the sugar dissolves and bubbles form around the edge of the pan. Pour milk over the chocolate and stir with a whisk until the chocolate is completely melted and smooth. Allow it to cool for a few minutes until it is warm, not hot, to the touch.
  • Gently whisk the egg yolks, egg and vanilla in a small bowl until blended. Add the eggs to the chocolate and whisk until smooth. Put the chocolate into a pitcher or large glass measuring cup and pour it into the 6 ramekins. Fill the baking pan with enough very hot tap water to reach halfway up the sides of the ramekins.
  • Bake until the edges of the chocolate are firm and the center moves a little when jiggled, 15 to 20 minutes. Avoid touching the top of the cremes because they won’t be quite so pretty.
  • Take the baking pan out of the oven and remove the cups from the pan. Allow them to cool on the counter for an hour.
  • Cover with plastic wrap and refrigerate at least 2 hours before serving..


Friday, October 7, 2011

Chocolate Rum And Raisin Ice Cream


Yum yum yum..thats all I can say for now.  You definitely have to try this. I guess making your own ice cream somehow makes it extra special.  The rum used here makes this chocolate ice cream extra tastier  and I absolutely love the raisins.  This time I did not use a low fat milk but instead mixed it with some whole milk so that its a little creamier but of course you can make it with low fat milk without worrying about compromising the taste.

Source:  Redneck Waitakere

Ingredients

1½ cup low fat milk
15g cocoa powder
100-120g sugar
2 large eggs
pinch salt
1 cup whipping cream or heavy cream

2 Tbsp rum
25g  cocolate, roughly chopped or raisins

(If using raisin, I just soak the raisin with 1 tbsp rum just before adding them in)

Method
  • Pour milk, sugar and cocoa into a saucepan. Heat on medium-low to a simmer point (do not allow to simmer).
  • In another container whisk the eggs. Gently whisk the hot milk into the egg mixture to temper it.
  • Return the entire mixture, half the cream, and salt into the saucepan and heat on medium-low heat until custard consistency stirring all the time (5-10 minutes). Run a finger down the center of the spoon, and if a line remains separating the two custard halves, then your custard is thick enough and done. 
  • Remove custard from the heat. Lightly whip the remaining cream and add to the custard. This helps to cool the custard and prevents it from cooking further.
  • Add the alcohol. Stir well to combine. Strain for a smoother ice cream (optional).
  • Cover the top of the mix with a clingwrap to prevent a skin from forming.
  • Refrigerate overnight to let the flavor develop.
  • Churn in ice cream machine and add some of the choc chunks or raisins. Spoon mixture into an airtight container, sprinkle the rest of chopped chocolate on top. Freeze for several hours.
  • Leave at room temperature for 5-10 minutes before serving.


Tuesday, October 4, 2011

Vanilla Ice Cream


I am in the mood of making ice cream.  Its such a treat to make your own ice cream and knowing that you can control the ingredients that go inside.  My hubby bought me an ice cream maker this weekend and so far I have made 2 types of ice cream.

Homemade ice cream is made out of 4 basic ingredient....milk, egg, cream and sugar. How healthy and fattening your ice cream is depend on the type of milk used and how much sugar or cream added in.  This ice cream is not the creamiest like the one in the store but surely is healthier version and can be enjoyed with less guilt.

Source:  Redneck Waitakere

Ingredients

375ml low fat milk 
100g sugar
1-2 vanilla bean
2 eggs
250 ml cream

2 Tbsp vodka, optional 

I added some chopped chocolate for the kids...
My 1 1/2 qt ice cream maker...


Method

  • Pour milk and sugar into a saucepan. Using a sharp knife, split the vanilla beans in half lengthways. Scrape out the seeds and add the pod and seeds into the milk. Heat on medium-low to a simmer point (do not allow to simmer).
  • In another container whisk the eggs. Gently whisk the hot milk into the egg mixture to temper it.
  • Return the entire mixture and half the cream into the saucepan and heat on medium-low heat until custard consistency stirring all the time (5 minutes). 
  • Remove custard from the heat. Lightly whip the remaining cream and add to the custard.
  • Add vodka. Stir well to combine. Remove vanilla pods and strain.
  • Cover the top of the mix with a cling wrap to prevent a skin from forming.
  • Refrigerate overnight to let the flavor develop.
  • Churn in ice cream machine and add the choc chunks. Spoon mixture into an airtight container and freeze for several hours.
  • Leave at room temperature for 5-10 minutes before serving.
Alcohol added to the recipe is to keep the ice cream from turning into a solid block.

Tuesday, September 20, 2011

Bee Hive Cake


This is one of the recipes that I love the most.  It is not overly sweet and of course does not use frosting.  The only part that I think would take some time is getting the sugar to caramelize.  Other than that pour everything together and whisk whisk and bake.  I have been making this for so many years now.  Some people usually steam the cake but I truly prefer baking it.

Ingredients

1 cup sugar
1 cup water
1 stick butter
1/2 tsp baking soda
1 cup flour
1/4 tsp salt
1/4 tin condensed milk
1 tsp vanilla essence
3 egg


Method
  • Preheat oven to 250 degrees.  Spray nonstick spray and line a 8 by 8 in square baking pan with parchment paper. Set aside.
  • In a medium sized frying pan, spray nonstick spray. On low heat fry the sugar till it melts and turns to golden brown, honey like color.  Make sure the heat is on very very low, slow pour in the 1 cup water and add in the butter. Leave it undisturbed for 10 minutes.  Off the heat.  Let cool completely.  Be very careful not to get the caramel on your hands, it can hurt real bad.
  • In a bowl, crack the eggs.  Using wire whisk or hand mixer beat the eggs slightly, add the condensed milk and beat slightly.  Sift in the flour, salt and baking soda. Slowly pour in the cooled caramel.  Using either the whisk or hand mixer beat till all is combined.
  • Pour into the prepared cake tin.  Bake for about 1 to 1 1/2 hours depending on the oven.  Use a toothpick and check if its done.  This cake is best eaten the next day. 


Sunday, September 4, 2011

Chocolate Souffle

It rose up really well but I forgot to take the picture immediately so by the time I took it  sank a bit..:(
I have baked many chiffon cakes that needs the egg whites to be beaten seperately but when it comes to souffle I have always dreaded it.  Today I made up my mind of go ahead and try this wonderful chocolate souffle which only uses 1 egg white and serves 2 people.  I am truly happy to find this recipe which have overcomed my fear of baking souffle.

These airy chocolate cakes puff up nicely in ramekins. To serve four, use five teaspoons flour and double the remaining ingredients. (Doubling the flour would make the base too heavy.)


Source: My recipes

Ingredients


Cooking spray
4 1/2 tablespoons granulated sugar, divided
1 tablespoon all-purpose flour
1 1/2 tablespoons Dutch process cocoa
2 tablespoons fat-free milk
1/4 teaspoon vanilla extract
1 large egg white
1 teaspoon powdered sugar

Method 

  • Preheat oven to 350°.
  • Coat 2 (6-ounce) ramekins with cooking spray; sprinkle each with 3/4 teaspoon granulated sugar.
  • Combine 2 tablespoons granulated sugar, flour, cocoa, and milk in a small saucepan over medium heat. Cook 2 minutes, stirring until smooth. Spoon chocolate mixture into a medium bowl; cool 4 minutes. Stir in vanilla.
  • Place egg white in a medium bowl; beat with a mixer at high speed until soft peaks form. Add remaining 2 tablespoons granulated sugar, 1 teaspoon at a time, beating until stiff peaks form (do not overbeat). Gently stir 1/4 of egg white mixture into chocolate mixture; gently fold in remaining egg white mixture. Spoon mixture into prepared dishes. Sharply tap dishes 2 or 3 times to level. Place dishes on a baking sheet; bake at 350° for 15 minutes or until puffy and set. Sprinkle each soufflé with 1/2 teaspoon powdered sugar. Serve immediately.
Note:  I topped my souffle with some white chocolate chips before baking and this did not affect the souffle.


Saturday, September 3, 2011

Egg Drop Soup

This is my easy version of egg drop soup.  I used egg whites and dried seaweed strips with some grated carrots and mushroom to make it a tad bit healthy...


Ingredients

3 egg whites, lightly beaten
4 cups of vegetable stock
1 tablespoon of corn starch
1/2 teaspoon grated ginger
1 tablespoon of soy sauce
3 green onions or chives, chopped
1/4 teaspoon of white pepper
3/4 cup of straw, enoki, or sliced shitaki mushrooms
Some grated carrot
Few dried seaweed strips

Method

Reserve 1/2 cup of the stock and mix with the cornstarch until dissolved.
Place the vegetable stock, ginger, soy sauce, green onions, carrot, mushrooms and white pepper in a pot and bring to a boil. Add the cornstarch and stock mixture and stir. Reduce heat to a simmer.

Add the dried seaweed and slowly pour in the beaten eggs while stirring the soup. The egg will spread out into ribbons. Turn off the heat and garnish with a few more chopped green onions. Serve immediately.

Monday, March 28, 2011

Caramel Custard with Dulce de leche


I know that I am going overboard with all this Dulce de Leche....oh lord I just cant help the taste of this milk.  Its so contagious......if its possible, I think I will bathe, use it as a lotion or just mix and drink the whole milk. The smell and taste is simply out of this world.  I was so happy to come across this recipe and immediately I thought that this recipe should be done right away. Took it over to a friends place and got thumbs up for it. Glad they loved it ...

I like to make creme caramel in individual ramekins because it makes them very easy to serve (and easy to serve to yourself if you only want to eat one at a time!). I used 6 ounce ramekins for this recipe, but the recipe can be doubled if you want to make more servings or use larger ramekins. If you are going to use smaller 4 ounce ramekins, you will want to check the custards early to make sure that they don’t overbake in the oven.

Ingredients

2/3 cup sugar
1/4 cup water
1 1/4 cups milk (pref. whole milk)
1/4 cup dulce de leche
1/4 tsp salt
2 large eggs
2 large egg yolks
1 tsp vanilla extract
large saucepan or kettle of hot water

Method
  • Preheat oven to 325F.
  • In a small saucepan combine sugar and water. Bring sugar to a boil and cook over medium heat until sugar turns a deep amber color, about 7-10 minutes. Divide into four 6-ounce ramekins, coating the bottom of each. Set ramekins aside.
  • In a medium saucepan, combine milk, dulce de leche and salt. Cook over medium heat, whisking occasionally, until the mixture is smooth and just comes to a simmer.
  • While the milk comes to a simmer, lightly whisk the eggs and egg yolks in a medium bowl. When the milk reaches a simmer, remove it from heat and temper the eggs by very slowly streaming the milk into the eggs while whisking constantly. Add the hot milk a few tablespoons at a time to ensure that you don’t curdle the mixture. Whisk in vanilla extract, then strain mixture into a large measuring cup or bowl with a pouring spout.
  • Arrange ramekins in a 9×13-inch baking dish. Divide custard mixture evenly into the ramekins. Place baking dish in oven and pour hot water into it until the water reaches approximately halfway up the sides of the ramekins.
  • Bake custards for 25-30 minutes, until just set. Remove from water bath and cool to room temperature. Refrigerate for 4 hours, or overnight.
  • To serve, run a sharp knife around the sides of each ramekin and invert onto a serving plate or bowl.
  • Serves 4.


Friday, March 4, 2011

Bacon and Egg tart

As how everyone feels, I am so afraid when it comes to pastry. You have to handle it with such care avoiding to overwork the dough but knowing me, always wanting to overcome my fear, went ahead in making the pastry and I must say I am glad that I did it. I made the mini tart with eggs, bacon and chives.  It was a hit at first try.

My tarts are not golden brown as I did not have the patience to
wait but to take it out and  try them ...yummy!! Well, it tasted almost like a quiche.

Ingredients

185gm flour
1 tsp baking powder
125g cold butter, cubed
85ml - 100ml milk mix with 1 tsp vinegar

2 tbsp chopped chives
2 tbsp bacon bits
dehydrated tomatoes (optional)
4 eggs
1 tsp garlic powder
1 tsp onion powder
100ml heavy cream
200ml milk
salt and pepper

Method

Sift flour and baking powder. In a food processor, pulse butter and flour together till it resembles breadcrumbs.  Slowly drizzle the milk and pulse mix till it comes together and is just moist enough to form a stiff dough.  This will only take couple of seconds.  (You might not use all the milk)
Transfer the mixture to a plastic wrap. Gather the wrap around the dough and flatten the dough to form a square. Do not knead the dough.
Leave dough in the fridge for 30 minutes or overnight.  This makes the dough easier to handle.
Divide the dough into 2 and roll out as required.  I used 20 mini tart tins for this recipe.

Topping

  • Beat the eggs, milk and cream. Add the salt, garlic powder and pepper ( do not add too much salt as the bacon bits are already salty) 
  • Mix in the chives, bacon and dehydrated tomato.
  •  Pour into the tart mould. Be careful not to overfill the pans as the egg mixture will overflow and makes it hard to unmould the tart. 
  • Bake in preheated oven 350 degrees for about 20 minutes or until the pastry is golden brown and the filling set.

Thursday, February 24, 2011

Lasagna with spinach

I just love lasagna but not the guys in my family so I tried making a simple version of it by doing the same procedure of the regular lasagna but instead of layering them, I just rolled each one individually.  So I got to make a few just for me and my daughter to enjoy.


Ingredients

11 sheets of lasagna noodles ( cooked as per direction on the box)

Filling


1lb ground meat ( beef, turkey, sausage)
1/2 tsp onion powder
1/2 tsp garlic powder
1/2 tsp dried oregano
1/4 tsp nutmeg
1 container ricotta cheese ( 15oz)
Frozen spinach, thawed and squeezed ( 10 oz)
Shredded mozarella cheese ( 2 cups)-reserve about 1/4 cup for later use
Parmesan cheese ( 1/4 cup)
Eggs (2)-lightly beaten
Pasta sauce ( 1 jar / 26 oz)
Salt to taste

Method

  • In a large pot, bring water to rapid boil. Add salt to flavor the pasta and reduce stickiness.  Add pasta and let cook for 10 minutes. Drain well and lay it on a wax paper or aluminium foil individually to keep from sticking.
  • In a large bowl, combine ricotta, mozarella, parmesan, spinach, onion powder, garlic powder, nutmeg and lightly beaten eggs. Stir well to combine.
  • In a pan, cook the ground meat and drain out the fat.  Add in the marinara sauce. Stir well. Take it off the heat.
  • Take about 2 heaped tablespoon of the filling and put on the lasagna noodles.  Roll them.  Pour about 1 cup of meat sauce mixture on a 13 x 9 in a baking dish and layer the lasagna rolls in it. Top it with the rest of the sauce mixture and sprinkle some reserved mozarella.
  • Bake for about 35 minutes till the sauce is bubbling and the cheese melted.
Hope you will enjoy this dish as much as I did. Hmmm I shall not mention about the damage it is going to do to my waistline. 


Monday, February 7, 2011

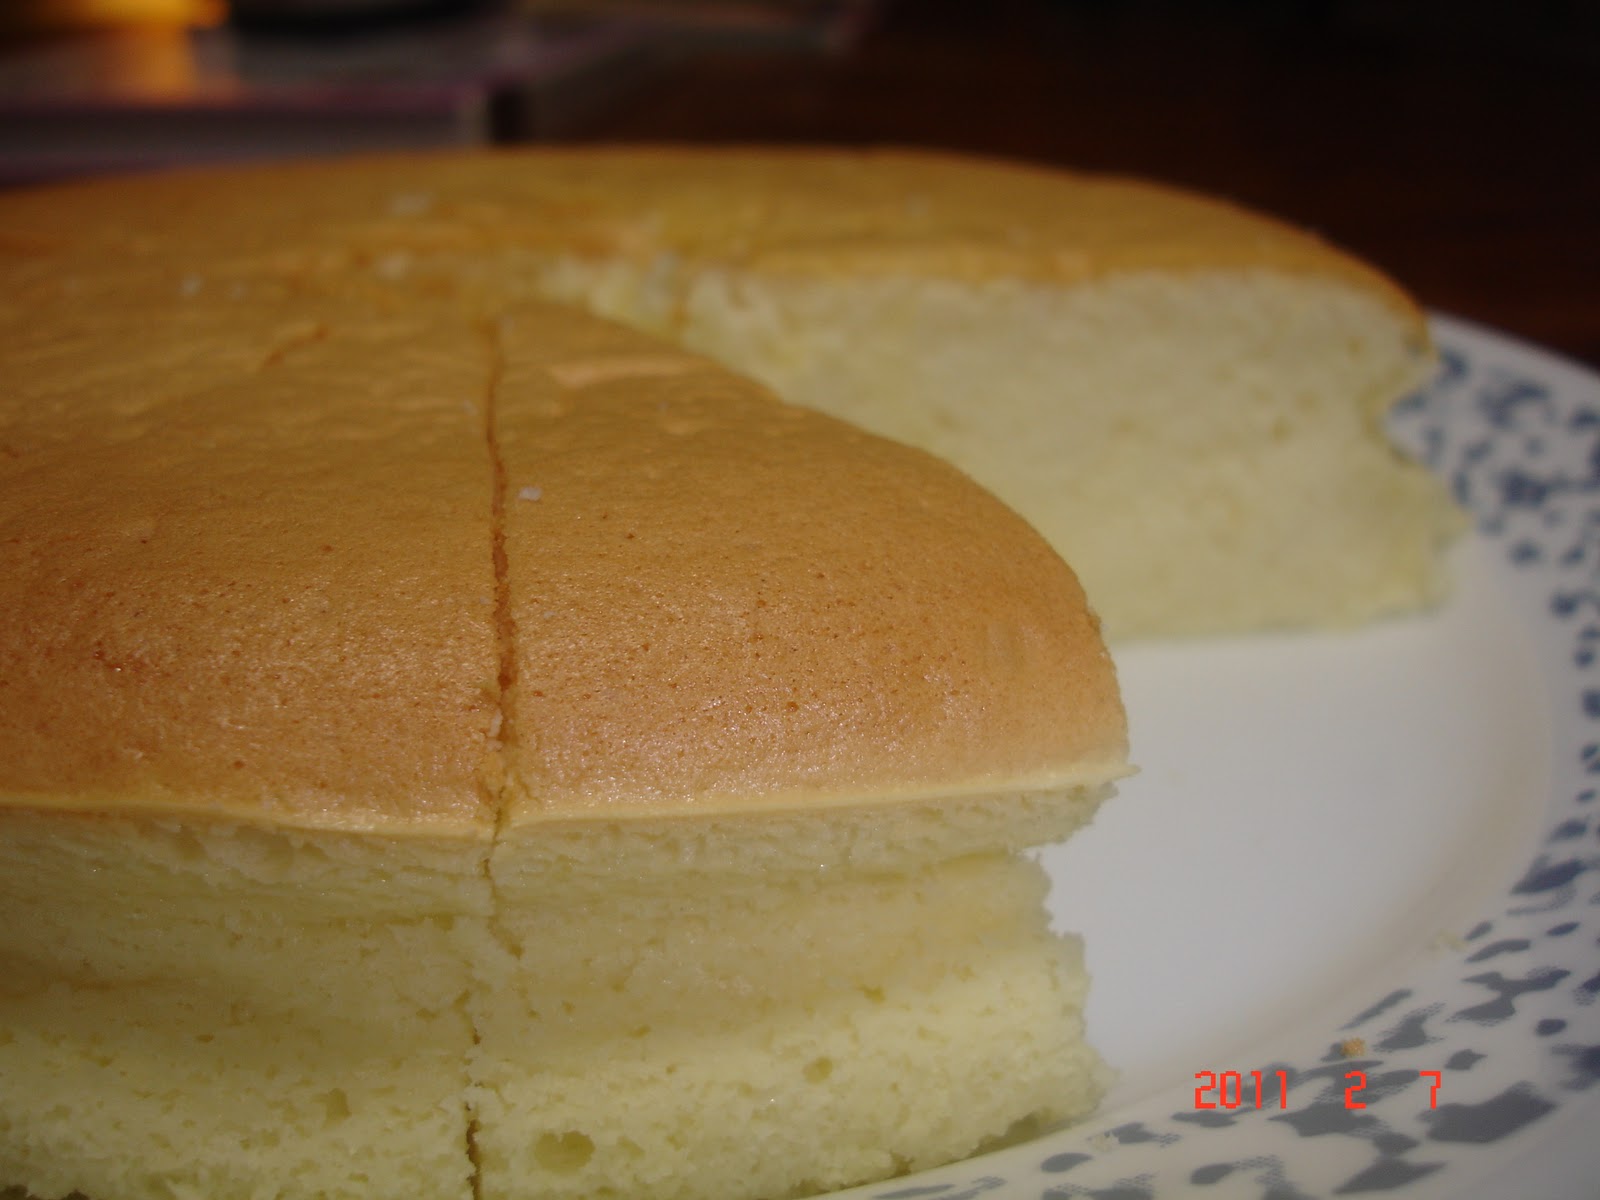
Cotton soft Cheesecake

Recipe for this cake can be viewed here.

Gather all ingredients,
Double boiler with cream cheese, butter and milk

Yolks and white seperate


Stiff peak when the beater is lifted
There should be little peaks when the beater is lifted up
Line a baking pan with greaseproof paper and let it sit in a water bath (bain marie)
Slowly mix the white with the yolk mixture
I like to use a silver slotted spoon for this. Try not to deflate the air in the whites
Pour into the baking pan. This time I just used a regular baking pan instead of the springform pan
The final product


A piece just for me....